
Chapter One: Core Rules
Tabletop Roleplaying

When you play a tabletop roleplaying game, your gamemaster (also called the GM) and fellow players are asking you to share your own story of exploring the post-nuclear wasteland, where mutated monsters lie in wait around every corner and fellow survivors harbor a deep suspicion of others. As a group, you will travel ruined highways and ramshackle towns, completing quests, and building settlements by describing what your character does as an improvised story. When you want to accomplish something in this story, you’ll use the game rules to resolve whether you succeed or fail at your task.
In any situation where your character’s success is in doubt, their failure is interesting, or they are at risk, you need to attempt a skill test. A skill test is a moment in the game where the rules are used to resolve a situation or conflict, but once that’s figured out the gamemaster continues narrating the scene based on your actions, and might describe how their non-player characters and creatures react.
This mode of play is freeform, where each player can act freely in no particular order, and fictional time passes as it makes sense to the actions your group attempts. When you begin fighting, play is divided up into rounds and turns, with each player taking a turn, and each round representing a short period of time in which every character gets to act.
Skill Tests
A skill test is a method of resolving an action you want your character to attempt. You roll some dice and the results tell you whether you succeeded, failed, or complicated the situation.
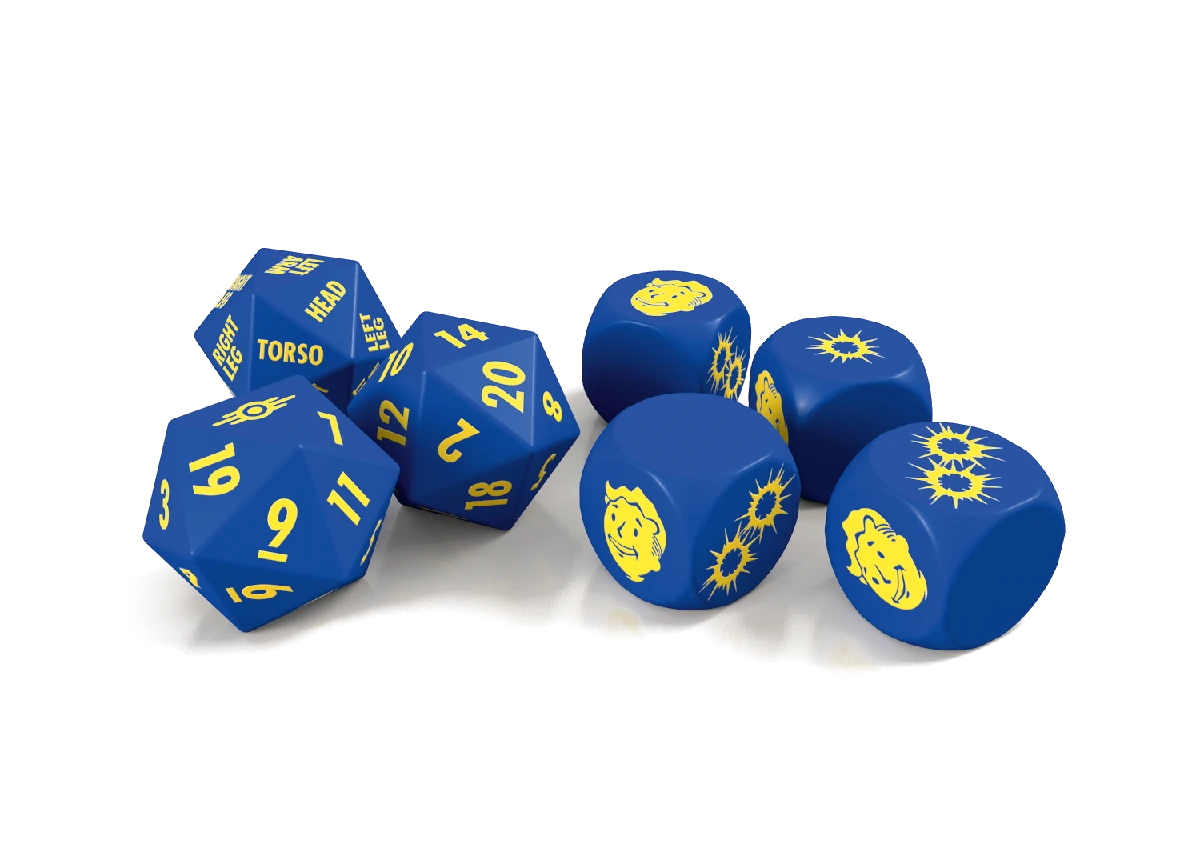
When the gamemaster asks you to attempt a test, they’re asking you to check your character’s attributes, roll a pool of 2–5 twenty-sided dice (also called d20s, presented as Xd20 where X is the number of d20s you roll), and get more successes than the gamemaster needs for you to pass the test.
Rolling The Dice
1. CHOOSE ATTRIBUTE + SKILL: The gamemaster chooses which attribute and skill from your character sheet are appropriate for your test. Add together the attribute and the skill chosen: this is your target number for each d20. You can suggest which attribute + skill might apply, but the GM has the final say.
- Your target number is the number each d20 must roll equal or under to generate one success.
2. SET THE DIFFICULTY: The gamemaster sets the difficulty for the test, normally between 1 and 5. The difficulty is the number of successes you must generate with your d20s to pass.
3. ROLL THE DICE POOL: Assemble your dice pool. You start with two d20s, but you can buy up to 3 more d20s by spending Action Points (see Action Points section). After you’ve added any extra dice from spending Action Points, roll the entire dice pool.
4. CHECK FOR SUCCESSES: Each d20 that rolls equal to or less than your target number scores one success. Any d20 that rolls a 1 is a critical success, which is worth two successes.
- Each d20 that rolls a 20 generates a complication
5. CHECK SUCCESSES AGAINST THE DIFFICULTY: If the number of successes you scored equals or beats the difficulty of the test, then you have passed. If the number of successes scored is less than the difficulty, you have failed.
- Each success above the difficulty becomes an Action Point
6. GET THE RESULT: The gamemaster describes the outcome, and if the test was successful you can spend Action Points to improve the result further. After that, the GM introduces any complications.
Example: Nate needs to find out if Codsworth is okay, as he’s been on his own for 200 years. His test is difficulty 1, and he must use CHA + Speech (7 + 2 = 9). Nate’s player rolls 2d20, checking the results separately, and rolls a 5 and a 19—because the 5 is equal or below Nate’s target number, he scores 1 success, and passes the test. Codsworth describes how hard it’s been to try and keep the house clean for two centuries…
Target Number
When your gamemaster asks for a skill test, you agree to an attribute + skill combination from your character sheet that best applies to the action you’re trying to achieve. That target number, made by adding your chosen attribute and skill together, gives you the number each d20 must roll equal to, or under—if it does then you generate one success.
Successes And Difficulty
The number of successes you need to generate with your d20s to pass a skill test is called the difficulty. Only needing 1 success describes a routine task, while needing 5 successes reflects a difficult task that can only be completed with guts and determination.
Each d20 that rolls equal to or under the target number generates 1 success. However, a d20 can generate 2 successes by rolling a critical success. For example, if you had a target number of 10 (made up of an attribute + skill combination of 8 + 2), each d20 that rolled 2–10 would generate 1 success, while any d20s that rolled 1 would generate 2 successes.
Total up the number of successes and compare them against the difficulty—if you equal or beat the difficulty you pass the test. Any extra successes over and above the difficulty become Action Points (see p.14) that allow you to improve the test’s outcome or buy more d20s for future tests.
Test Difficulty Examples
| DIFFICULTY | EXAMPLE | |
|---|---|---|
| 0 | Gathering rumors around a settlement, searching a room in an abandoned building | |
| 1 | Shooting a target at close range, picking a simple lock | |
| 2 | Breaking down a reinforced door, treating an injury | |
| 3 | Identifying an unknown poison, deactivating a robot from behind | |
| 4 | Hacking a complex computer, disarming a landmine | |
| 5 | Convincing an enemy to stand down, shooting a target at long range on a stormy night | |
Critical Successes
Whenever you attempt a test, any d20 that rolls a 1 is a critical success. Each critical success you roll generates two successes.
Complications
When attempting a test, each d20 that rolls a 20 causes a complication—a new detail in the scene that makes things more difficult that comes into effect once the test has been resolved. A complication could introduce a new problem—like a gun jamming, or breaking a lock pick—or it could make specific skill tests more difficult in future, like insulting a merchant so CHA + Barter tests with him in future are increased in difficulty by 1. Complications do not prevent you from succeeding, but they do introduce something new to the story that makes things more difficult.
If you and the gamemaster can’t come up with a complication for you in the scene you’re in, the GM can instead gain 1 Action Point to use for their non-player characters and creatures later.
Example: MacCready has a mysterious disease, and his player has rolled a complication on his Medicine test to try and recover a little to keep moving north. The GM can’t think of a complication and asks the group, “Do you have any ideas?” MacCready’s player suggests, “he could get a fever,” and the GM takes the suggestion and uses it. “Your head pounds— any INT test difficulties are increased by 1 until you get it healed.”
Dice Pool
Normally, you roll two d20s and check their results individually against your target number and count up the number of successes you generate, but you can buy more dice to roll! With Action Points you can buy up to 3 more d20s to roll on a test. This means you can roll a total pool of 5d20 at any one time. Action Points are covered on page 14.
Example: Cait is facing a difficulty 3 test to steal some bottle caps from right under her captors’ noses, and with 3 Action Points in the group pool, she opts to purchase two more d20s using all 3 AP in the pool. Her player will now roll 4d20, improving the odds of generating the 3 successes they need.
Difficulty Zero Tests
Some tests may be difficulty 0, or your character’s perks or gear may reduce a test’s difficulty to 0. If a test is difficulty 0, you don’t need to roll—your action is automatically successful with no risk of complications. However, because no roll is made, you don’t generate any Action Points either.
At your GM’s discretion, you can still choose to roll the dice against a difficulty of 0. Because zero successes are required, every success becomes an Action Point, but you can still suffer complications by rolling a 20, as normal. This sort of difficulty 0 test is useful if it’s important to see how successful your character is when there’s no chance of failure.
Opposed Tests
Sometimes you’ll face situations that are not difficult because of the task itself, but because of an opposing force trying to prevent your success. In these cases, you and the opposing player (normally the GM) will both roll a dice pool and compare results to see who wins.
When another character opposes you in a test, their player rolls their d20 dice pool, after buying any extra d20s, and the number of successes they generate becomes the difficulty of your test. Then, you attempt your test with your opponent’s number of successes as your difficulty. If you equal or beat your opponent’s number of successes, you win the opposed test, and any extra successes become Action Points. If you do not generate enough successes to meet the difficulty, you fail, and your opponent could generate AP.
Example: Paladin Danse is grappling a deathclaw, holding it back from advancing on his squad. The GM decides this is an opposed test and rolls a test for the deathclaw. Rolling 2d20, the GM scores 3 successes, meaning Danse’s test will be difficulty 3. Danse has a target number of 8, so his player decides to buy two more d20s with the Action Points in the pool, to ensure he gets the successes he needs and rolls the pool of 4d20s. They roll a 1, 5, 6, and 18, which generates 4 successes! Danse holds his ground, and banks 1 AP for the extra success. Had he rolled a 10 instead of a 1, he would have failed by one success instead, and the GM would have gained one AP for the deathclaw.
Assistance
Difficult tasks are often completed through teamwork. When someone else is attempting a test, you can assist them if your GM allows it. Describe how you are helping and decide with the GM which attribute + skill combination you’re using—it doesn’t have to be the same combination as the person you’re helping. Then, roll 1d20 and add any successes you generate to theirs, providing they score at least 1 success of their own. If they didn’t generate any successes, then you can’t add your successes to the total.
You can’t buy additional d20s if you are assisting—you can only roll 1d20—but your d20 doesn’t count towards the limit of 5 that the player attempting the test can roll in their dice pool.
While assisting, you can score critical successes or complications as normal.
Example: Dogmeat is assisting the Sole Survivor in finding some medicine. The GM rolls 1d20 and adds any successes they get to the Sole Survivor player’s roll—provided the Sole Survivor’s player gets at least 1 success. Dogmeat’s target number is 13. Rolling 1d20, his controlling player rolls a 5, generating 1 success, adding it to the Sole Survivor’s 1 success, for a total of 2 successes.
Group Tests
When your whole group attempts a single large activity, like sneaking through an area together, or travelling through a hazardous area, you make a special kind of assisted test. This normally occurs when the difficulty is particularly high, requiring multiple participants to make short work of the task. Once the GM has set the difficulty, you must decide who is going to lead the test, while the rest of the group assists.
The leader of the group test rolls a normal dice pool: 2d20 plus up to 3d20s they buy through Action Points. Everyone else rolls 1d20, using their own attribute + skill. So long as the test leader achieved 1 success, everyone assisting adds any successes they generated to the leader’s score. If those accumulated successes equal or beat the difficulty, the group has passed the group test.
Any complications generated by anyone in the group rolling a 20 can be applied by the GM after resolving the test and its consequences.
Example: The Sole Survivor is sneaking past a group of synth seekers, with Deacon and Strong, helping an escaped synth to their new life. The GM makes the test difficulty 4, as the synth patrol is incredibly vigilant. As Deacon is the best at Sneak, he leads the test. His player will roll 2d20, and they spend 1 AP to increase their dice pool to 3d20. Both the Sole Survivor and Strong roll 1d20 each. Deacon scores 2 successes, the Sole Survivor scores 1 success, but Strong’s player fails their roll—the group scoring 3 of the 4 successes they need. The GM resolves the test, describing how Strong was too noisy, and the job of sneaking past the synth group becomes a combat encounter.
Complication Range
Normally, any d20 that rolls a 20 generates a complication, however some actions can be riskier instead of just more difficult. When tests are riskier, the GM can increase the complication range of the test, so you generate complications on more results than just a 20. For each increase in the complication range, a complication is generated on the listed d20 results in the complication range table.
Complication Range Table
| COMPLICATION RANGE | COMPLICATIONS GENERATED ON A…. | DESCRIPTION |
|---|---|---|
| 1 | 20 | Normal |
| 2 | 19-20 | Risky |
| 3 | 18-20 | Perilous |
| 4 | 17-20 | Precarious |
| 5 | 16-20 | Treacherous |
Action Points
When you check your successes against the task difficulty, each success you generate above the difficulty becomes an Action Point. For example, if the task’s difficulty is 2, and you generate 3 successes, the extra success becomes 1 Action Point.
Action Points can be used to take additional actions, improve the outcome of a test, reduce the time it takes, learn more about a situation, or buy more d20s in future tests.
You can spend Action Points to do the following:
- Buy d20s (1–6 AP): Buy bonus d20s for a test, before the dice pool is rolled, but after the GM sets the difficulty. The cost increases for each die purchased: the first d20 costs 1 AP, the second costs 2, and the third costs 3. No more than three bonus d20s may be rolled for a single test, including any d20s from perks or traits.
- Obtain Information (1 AP): Ask the gamemaster a single question about the current situation, based on your test. The GM has to answer truthfully, but the answer might not be complete.
- Reduce Time (2 AP): AP from a successful test can allow the test to take less time to complete, when time is important. Spending 2 AP halves the amount of time a test takes to attempt.
In combat, you can spend Action Points to do the following:
- Take Additional Minor Action (1 AP): Take 1 additional minor action in your turn. You can only take a total of two minor actions in a single round.
- Take Additional Major Action (2 AP): Take one additional major action on your turn. Any skill test you must attempt is increased in difficulty by +1. You can only take a total of two major actions in a single round.
- Add Extra Damage (1-3 AP): On a successful melee attack or thrown weapon attack you can spend AP to add 1dC6 per AP spent, up to a maximum of +3 1dC6 for 3 AP.
Bonus d20 Costs
| DICE POOL | BONUS D20s | AP COST |
|---|---|---|
| 2d20 | – | 0 |
| 3d20 | +1d20 | 1 |
| 4d20 | +2d20 | 3 |
| 5d20 | +3d20 | 6 |
You spend Action Points either before or after you roll dice, and each option describes when you can spend Action Points to take advantage of its effect. You buy extra d20s for a test before you roll, while you spend Action Points after a test to obtain information, reduce the time, improve the quality of the success, or take an additional action.
Buying Dice Without Action Points
If you don’t have any Action Points to buy d20s, you may instead generate AP for the gamemaster. For each AP you want to spend in this way, the GM adds 1 AP to their pool, which they can use later on their NPC’s actions and tests. You may only give the GM action points to buy d20s; you can’t do this for other uses of AP.

Saving Action Points
If you don’t want to spend the Action Points you generate immediately, you can save them for the group to use later. You can save up to a total of 6 AP as a group, and anyone can use the Action Points in the group pool.
The Gamemaster's Action Point Pool
Just like you, the GM has a pool of their own Action Points to spend on their NPC’s actions. They start each game session with 1 AP per player. There is no maximum to how many Action Points the GM can have in their pool.
Luck
In addition to being one of your attributes, your Luck also provides Luck points that you can spend to shift the odds in your favor in a number of different ways. When you start each session with a number of Luck points equal to your Luck attribute. You can spend Luck points to do one of the following options, both during freeform play or on your turn in combat.
LUCK OF THE DRAW
You may spend a Luck point to introduce a helpful fact or detail about the situation you’re in, something that you’d have to be lucky to encounter. You could find just the right items or the right kind of ammo while you’re scavenging, find a key to a locked door, or a clue to a computer password. The gamemaster may prompt you with an opportunity to do this, or you may suggest when it could happen, but they can veto your suggestions, or ask you to spend multiple Luck points to make it happen.
STACKED DECK
You may spend 1 point of Luck, before you attempt a skill test, to use LCK instead of the default attribute used for that test to determine your target number. Obviously, this only really has a benefit if your Luck is higher than the attribute it’s replacing.
LUCKY TIMING
In a combat encounter, at the start of any round, or immediately after any other character or creature has acted, you may spend 1 Luck to interrupt the normal initiative order and take your turn for this round immediately. This counts as your normal turn—it simply allows you to act earlier—and you cannot do it if you have already taken a turn this round.
Miss Fortune
You may spend one or more Luck points to re-roll dice in a dice pool you roll. You may re-roll one d20, or up to three dC6, by spending one Luck point, and you can spend multiple Luck points on a roll. Each die may only be re-rolled once—you cannot re-roll a die that has already been re-rolled. You must accept the re-rolled result, even if it is worse than the original roll.
Example: Nick Valentine is hacking a computer and his player hasn’t generated enough successes to pass the skill test. They need 2 successes, and have rolled a 9 and a 19, generating only 1 success. Nick’s player decides to spend a point of his Luck, and re-roll the d20 that rolled a 19. Rolling it again, Nick’s player gets a 6, generating the second success they need to pass the test.
Luck Options Summary
| LUCK SPEND | DESCRIPTION |
|---|---|
| Luck of the Draw | Add a detail to a scene |
| Stacked Deck | Use your LCK attribute for a skill test |
| Lucky Timing | Interrupt the normal turn order to take your turn now |
| Miss Fortune | Re-roll 1d20 or 3dC6 per Luck point spent |

Regaining Luck
You start your quest with a number of Luck points equal to your Luck attribute. Once you’ve spent a point, it can’t be used again until the gamemaster refreshes them when you reach a milestone in your session, or when you start a new session. When they are refreshed, you get all your Luck points back, no matter how many you’ve spent. You can’t have any more Luck points than your Luck attribute.


