Chapter Two: Combat
Combat Encounters
Combat encounters involve characters attacking their opponents and defending themselves and their allies, and are more structured than freeform play. Instead of freely taking actions, the encounter is broken down into rounds, and during each round, each character takes a single turn. A round represents a short amount of time—a few seconds, up to a minute at most—that allows all the characters present to complete their actions, and there are as many rounds in a combat encounter as are needed to resolve the conflict.
You can attempt one minor action and one major action in each turn. A minor action represents something quick or supportive of your major action, like aiming or drawing a weapon, while a major action represents something that involves more concentration or effort, like attacking an opponent, defending yourself, hacking a computer, or picking a lock.
Initiative
When combat begins, the player who initiated the combat takes a turn immediately. Once this is done, the gamemaster ranks the combatants in order of their initiative statistic, from highest to lowest, and the first round begins. In each round, the character with the highest initiative goes first, and then each character takes a turn in order of highest to lowest. If there is a tie, the GM decides which character or creature goes first. Once the last character has completed their turn, the round ends, and the character with the highest initiative takes the first turn of the next round. Repeat this sequence until the conflict ends.
INITIATIVE STATISTICS
- Your character’s initiative is equal to their Perception plus their Agility, plus any bonuses from equipment or perks.
- A Character NPC’s initiative is calculated in the same way as player characters, though some powerful NPCs add bonuses.
Actions
You can attempt one minor action on your turn in combat. You can take one additional minor action by spending 1 Action Point, and you can take one additional major action by spending 2 Action Points, but the difficulty of any test attempted on that second major action is increased by 1. You may take your actions in any order you wish during your turn.
You cannot take more than two minor actions and two major actions on your turn by any means. You cannot take more than one movement action per turn.
MINOR ACTIONS
- Aim: Re-roll 1d20 on the first attack roll you make this turn.
- Draw Item: Draw one item carried on your person or pick up an object or item within your reach. You may put an item away as part of this action.
- Interact: Interact with your equipment or environment in a simple way, like opening a door, or pushing a button.
- Move: Movement action. Move up to one zone, to any position within Medium range. Alternatively, stand up from a prone position.
- Take Chem: Administer a dose of a chem that you are holding, targeting yourself or a willing character within your reach. If you’re not holding the chem, then you need to draw it first.
MAJOR ACTIONS
- Assist: You assist another character with their next test. When the character you are assisting takes their turn and attempts their task, you provide assistance. If you have not yet acted this round, you may give up your turn later in the round to assist an ally when they attempt a skill test.
- Attack: Make a melee or ranged attack, as described in Making an Attack, p.21.
- Command an NPC: If you have an allied NPC under your command, choose a single major action for them to take. If the action requires a test, then you automatically assist using your CHA + Speech (if the NPC is a person), CHA + Survival (if the NPC is an animal), or INT + Science (if the NPC is a robot).
- Defend: You focus on protecting yourself. Make an AGI + Athletics test with a difficulty equal to your current Defense. If you succeed, add +1 to your Defense. For 2 AP, add an extra +1 to your Defense.
- First Aid: You try to quickly patch the wounds of yourself or an ally. Make an INT + Medicine test, with a difficulty equal to the number of injuries the patient has, and increase the difficulty by 1 if you are trying to perform first aid on yourself. If you succeed, you can either: * Heal HP equal to your Medicine rating. * Treat one injury the patient is suffering from. * Stabilize a dying patient.
- Pass: You choose not to do anything.
- Rally: You grit your teeth, catch your breath, and prepare yourself. Make an END + Survival test with a difficulty of 0, and save any Action Points you generate. The GM may allow you to use a different ATT + skill for this action depending on how you describe it, such as CHA + Speech to inspire your allies.
- Ready: Describe a situation you expect to occur, and choose a major action you will perform when it does. If that action occurs before the start of your next turn, you may perform that major action immediately, interrupting other characters’ actions as necessary. If more than one character has readied an action for the same situation, their readied actions occur in initiative order.
- Sprint: Movement action. You move up to two zones, to anywhere within Long range.
- Test: Perform a skill test for an action not covered by the other actions, with the gamemaster’s permission.
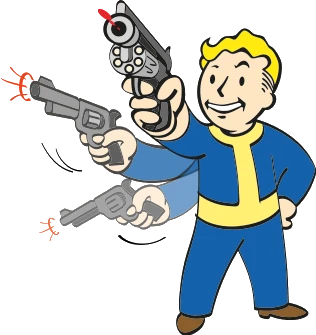
Making An Attack
1. CHOOSE WEAPON AND TARGET: Select one weapon you are currently wielding. Then, select a single character, creature, or object as the target. If you’re using a melee weapon, the target must be visible to you and within your reach. If you’re using a ranged weapon, the target must be visible to you.
- Choose Hit Location: You may choose to target a specific part of a target creature or character. This increases the difficulty of the attack by 1.
2. ATTEMPT A TEST: The test is determined by the type of weapon used.
- Melee Weapon: Roll a STR + Melee Weapons test, with a difficulty equal to your target’s Defense.
- Ranged Weapon: Roll an AGI + Small Guns, END + Big Guns, or PER + Energy Weapons test (based on the ranged weapon you’re using), with a difficulty equal to your target’s Defense. This is modified by the range to the target (see Range)
- Thrown Weapon: Roll a PER + Explosives or AGI + Throwing test, with a difficulty equal to the target’s Defense, modified by range.
- Unarmed: Roll a STR + Unarmed test, with a difficulty equal to your target’s Defense.
3. DETERMINE HIT LOCATION: If you passed your test, roll 1d20 or a hit location die to determine the part of the target you hit. If you chose a specific hit location already, you hit the chosen location instead.
4. INFLICT DAMAGE: Roll a number of Combat Dice (dC6) listed by the weapon’s damage rating, plus any bonuses from derived statistics, or from AP or ammo spent. Reduce the target’s health points by the total rolled.
- Resistances: The target reduces the total damage inflicted by their Damage Resistance against the attack’s damage type, on the location hit. Characters and creatures have different DRs for different types of damage: physical, energy, radiation, and poison.
5. REDUCE AMMUNITION: If you made a ranged attack, remove one shot of ammunition, plus any additional shots of ammunition spent on the attack. If you made a thrown weapon attack, remove the thrown weapon from your inventory.

Hit Locations
There are 6 body parts that you can target as hit locations: head, torso, left arm, right arm, left leg, and right leg. When you successfully hit an opponent with an attack, you either randomly determine which body part you hit, or hit the body part you chose before you made the test. Use the Hit Locations table for reference.
CREATURES WITH OTHER HIT LOCATIONS
Some creatures in the wasteland may have other body parts—wings, claws, and tails—that do not appear on the hit location table. These locations will be listed in the creature’s statistics, replacing the Hit Locations table with its own.
Hit Locations
| D20 ROLL | HIT LOCATION |
|---|---|
| 1–2 | Head |
| 3–8 | Torso |
| 9–11 | Left Arm |
| 12–14 | Right Arm |
| 15–17 | Left Leg |
| 18–20 | Right Leg |
Range
Ranged and thrown weapons can be used to attack any target you can see, but they vary in effectiveness depending on how far away the target is from you. Ranged weapons have an ideal range noted in their profile (just listed as Range), which is based on the relative distance between the attacker and the target, using the zones of the combat environment (see Distances and Ranges). A weapon’s ideal range is one of the following:
- Close (C): The weapon is most effective against targets within the same zone.
- Medium (M): The weapon is most effective against targets in an adjacent zone.
- Long (L): The weapon is most effective against targets two zones away.
- Extreme (X): The weapon is most effective against targets three or more zones away.
The difficulty of a ranged attack increases by one for each range band outside of the weapon’s ideal range, whether closer or further away—a long sniper’s rifle is deadly at Long ranges, but awkward and unwieldy in close quarters, while a pistol is great at Close range but less useful at longer distances.
Example: A scoped hunting rifle with a Long range will add +1 to the difficulty of its attacks at Medium range or Extreme range, and add +2 to the difficulty of attacks at Close range. A shotgun with a Close range adds +1 to the difficulty of attacks at Medium range, +2 at Long range, and +3 at Extreme range.
Weapon Range Difficulty
| Weapon Range | ||||
|---|---|---|---|---|
| RANGE TO TARGET | Close | Medium | Long | Extreme |
| Close (same zone) | 0 | +1 | +2 | +3 |
| Medium (adjacent zone) | +1 | 0 | +1 | +2 |
| Long (2 zones) | +2 | +1 | 0 | +1 |
| Extreme (3+ zones) | +3 | +2 | +1 | 0 |
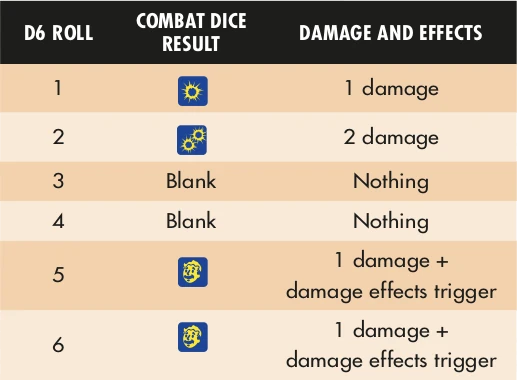
Combat Dice
When your attack hits its target, you inflict an amount of damage determined by the weapon’s damage rating. This damage rating is described as a number of Combat Dice, abbreviated with the dC6 symbol throughout this rulebook.
Combat Dice are specially-designed six-sided dice, with four different results as shown on the Combat Dice Results table. If you don’t have any Combat Dice, you can simply use normal six-sided dice (d6) and compare the results to the table below.
When you hit, roll all the dC6 for the attack together as a single dice pool, and total up the result. This total is the amount of damage you inflict on your target. In addition, any effect symbols (the face showing the dC6 symbol) activates special abilities—called damage effects—listed for the weapon.
INCREASING DAMAGE
You can increase the number of Combat Dice you roll to inflict damage with an attack by spending Action Points or ammunition, depending on the type of weapon you are using.
For melee weapons (including unarmed attacks) and thrown weapons, each Action Point (AP) you spend adds +1dC6 to roll in your damage dice pool. You can spend up to 3 AP to increase your dice pool by up to +3dC6 . You can only spend AP you have saved in the group pool or generated with your attack: you cannot generate AP for the gamemaster to use this AP option.
For ranged weapons, each unit of ammunition you spend adds +1dC6 to roll in your damage dice pool. You can spend ammunition up to the gun’s fire rate. For example, a 10mm pistol has a fire rate of 2, so you can spend 2 additional 10mm bullets to increase the Combat Dice pool. An Institute laser rifle has a fire rate of 3, so you can spend up to 3 charges from a fusion cell to increase its Combat Dice pool.
Damage Types
There are four damage types in Fallout: physical, energy, radiation, and poison damage.
Each weapon lists the type of damage it inflicts:
- Physical: Unarmed attacks, blunt force, slashing and stabbing, ballistics.
- Energy: Laser, plasma, and flame weapons.
- Radiation: Exposure to RADs, or nuclear weaponry.
- Poison: Toxins, chemicals, and creatures’ stings and barbs.
Each target has a Damage Resistance (DR) for each of these types, based on their clothing, armor, or naturally tough hides and chitin. While most forms of protection provide physical DR, energy DR is rarer, while radiation or poison protection are particularly rare.
Damage Effects
Damage effects augment how the damage you inflict to a target is applied. When you roll one or more 1dC6 symbols in your Combat Dice pool, all your weapon’s damage effects are triggered. Some damage effects are also based on the number of 1dC6 symbols appearing in your result, as described in each entry.
Each weapon lists its damage effects immediately after its damage rating.
- Burst: The attack hits one additional target within Close range of the primary target for each Effect rolled. Each additional target spends 1 additional unit of ammunition from the weapon.
- Breaking: For each Effect rolled, reduce the number of dC6 a target’s cover provides by 1, permanently. If the target is not in cover, instead reduce the DR of the location struck by 1, according to the damage type of the weapon—physical damage only reduces physical DR, for example.
- Persistent: If one or more Effects are rolled, the target suffers the weapon’s damage again at the end of their next and subsequent turns, for a number of rounds equal to the number of Effects rolled. The target can spend a major action to make a test to stop persistent damage early, with the difficulty equal to the number of Effects rolled, and the attribute + skill chosen by the GM. Some Persistent weapons may inflict a different type of damage to the weapon, and where this is the case, it will be noted in brackets, for example: Persistent (Poison).
- Piercing X: Ignore X points of the target’s DR for each Effect rolled, where X is the rating of this damage effect.
- Radioactive: For every Effect rolled, the target also suffers 1 point of radiation damage. This radiation damage is totalled and applied separately, after a character has suffered the normal damage from the attack.
- Spread: For each Effect rolled, your attack inflicts one additional hit on the target. Each additional hit inflicts half the rolled damage (rounded down) and hits a random location even if a specific location was targeted for the initial attack.
- Stun: If one or more Effects are rolled, the target cannot take their normal actions on their next turn. A stunned character or creature can still spend AP to take additional actions as normal.
- Vicious: The attack inflicts +1 damage for each Effect rolled.
RADIATION DAMAGE
Radiation damage is applied differently than other damage types. Each point of radiation damage, after reduction for the location’s radiation DR, reduces a character’s maximum health points, rather than their current health points. If a character’s health point maximum is reduced below their current health point total, then their current HP are reduced as well.
Radiation damage is only reduced by a target’s radiation Damage Resistance, according to the location hit. If the radiation would affect the whole body, like an environmental effect, then use the character or creature’s lowest locational radiation DR.
In all cases, where a character would suffer radiation damage and another type of damage at the same time, resolve the radiation damage after any other types of damage.
Example: Piper is attacked by a glowing feral ghoul, taking 3dC6 radiation damage. The GM rolls their dC6 and totals 4 damage with an Effect, inflicting 4 physical damage and 1 radiation damage. Piper has 2 physical resistance, so she reduces her current health points by 2. Then, she reduces her maximum health points by 1 because of the radiation damage.

Damage and Injury
A character that has lost health points (HP) isn’t seriously hurt—they may have suffered scratches, scrapes, cuts and bruises—but nothing that would hinder them. However, once a character’s health points are reduced to 0, they are defeated, and begin dying. In addition, characters may suffer from serious injuries as a result of being reduced to 0 HP, or as a result of critical hits.
Critical Hits and Injuries
A critical hit occurs whenever a character suffers five or more damage in one hit (after reductions from Damage Resistance). A critical hit imposes an injury on the character, which confers a penalty depending on the location hit.
- Arm: You drop any object held in that hand, and the arm is broken or otherwise unable to move. You cannot perform any actions using that arm—by itself or alongside your other arm.
- Leg: You immediately fall prone as your leg gives out under your weight. You can no longer take the Sprint action, and the Move action is now a major action for you.
- Torso: You begin bleeding heavily. At the end of each of your subsequent turns, you suffer 2dC6 physical damage, ignoring all your Damage Resistances.
- Head: You are momentarily dazed and lose your normal actions in your next turn (though you may spend AP for extra actions as normal). Further, you cannot see clearly, and increase the difficulty of all tests which rely on vision by +2.
These effects last until the injury has received medical attention.
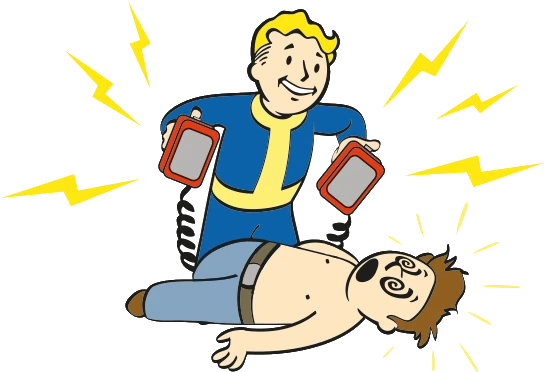
Dying
When your character is reduced to 0 HP, they suffer an injury to the location struck, and then fall prone and start dying. If they suffer a critical hit and are reduced to 0 HP, they suffer two injuries: one for the critical hit, and one for being reduced to 0 HP.
While they are dying, they are unconscious, cannot recover HP from the First Aid action, and cannot take any actions. Furthermore, at the start of each of your turns while they’re dying, you must attempt an END + Survival test, with a difficulty equal to the number of injuries they have, and a complication range of 19-20. If you pass this test, they remain alive, but are still dying. If you fail, they die.
If they suffer any damage while dying, they immediately gain one additional injury, in addition to any injury caused by another critical hit.
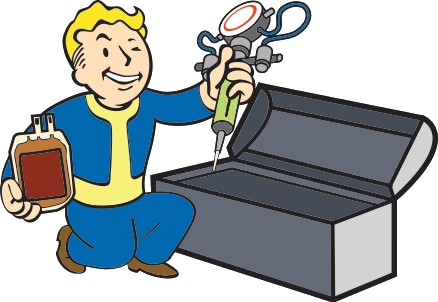
Healing
When you’ve taken damage, there are a number of ways you can recover. In the midst of combat, stimpaks and first aid are the only ways to heal, but outside of combat you have several options.
The Medicine and Survival skills are the most useful skills for healing.
Healing Actions In Combat
During a combat encounter, you can use the following methods to restore health and treat injuries.
- Take Chem: A number of chems, most commonly stimpaks, can be used in a hurry in combat to restore health points. Taking the minor action allows you to administer the chem to yourself, or to a willing creature within your reach.
- First Aid: You try to quickly patch the wounds of yourself or an ally. Attempt an INT + Medicine test, with a difficulty equal to the number of injuries the patient has, increasing the difficulty by +1 if you are trying to perform first aid on yourself. If you succeed, you can do one of the following: * Stabilize a dying patient * Heal Health Points equal to your Medicine rating * Treat one injury the patient is suffering from
STABILIZING THE DYING
Using the First Aid action, you can attempt to stabilize a dying character. This requires an INT + Medicine test with a difficulty equal to the number of injuries the patient has. Passing the test restores the character to 1 HP, they are no longer dying, and their player no longer has to attempt END + Survival tests to avoid death. The character remains unconscious and unable to take actions.
If radiation damage has reduced their maximum health points to 0, they cannot be stabilized until their maximum health points are above 0, by healing the radiation damage.
If you stabilize the patient, you can spend AP to heal additional health points. You can heal 1 HP for every AP spent. You may also spend 1 AP after stabilizing a character to wake them from unconsciousness, allowing them to continue to act.
REGAINING HEALTH
You can use the First Aid action to heal a character’s health. Passing an INT + Medicine test will heal a number of HP equal to your rank in the Medicine skill, and an additional 1 HP for every AP you spend. You can only heal the HP of a stable character.
TREATING AN INJURY
You can attempt an INT + Medicine test to treat an injury sustained from a critical hit. Passing the test allows a patient to ignore the penalties of their injury. An injury treated using First Aid is not fully healed: it’s merely been patched up so that it no longer imposes a penalty.
Whenever a character suffers any damage to a location which has a treated injury, roll 1dC6 . If you roll an Effect, the damage has re-opened that wound and the character is injured again. Completely recovering from an injury takes time.
Long-Term Recovery
Outside of combat, there are three ways a character can heal: rest, food & drink, and medical attention.
REST
Rest is the easiest way to recover from damage, though it is slow. If you can find somewhere to sleep, for at least six hours, you regain all lost HP. If you’re able to get eight hours of sleep somewhere safe and comfortable—your own bed in a settlement you belong to, for example—then you are considered Well Rested as well, and your maximum HP is increased by +2 until you next sleep.
When you sleep, if you have any injuries (treated or otherwise), make an END + Survival test with a difficulty of 1. The complication range on this test increases by +1 for each injury that has not been treated. If you succeed, you may recover from one of those injuries, plus an additional injury for every 2 AP spent.
The difficulty of this test varies based on how active you were during the preceding day:
Injury Recovery Difficulty
| ACTIVITY | DIFFICULTY | |
|---|---|---|
| Restful (no strenuous activity all day) | 1 | |
| Light (only a small amount of travel or similar) | 2 | |
| Moderate (travel, but no combat) | 3 | |
| Heavy (travel and combat) | 4 | |
You may only sleep once in any 24-hour period. Going without sleep for long periods can also be harmful.
FOOD & DRINK
While proper nutrition isn’t common in the wasteland, a decent snack, a hearty meal, or a refreshing beverage is still a vital part of life, and a valuable way to recover health.
Food and drink cannot be consumed during combat. Some forms of food and drink are irradiated, especially if consumed raw: roll 1dC6 when consuming irradiated food or drink, and if you roll an Effect, you suffer 1 Radiation damage, ignoring any DR from equipment or armour.
MEDICAL ATTENTION
Characters may require long-term medical care if they’ve been injured, poisoned, or are suffering from a disease. A single character can provide medical attention for a number of patients equal to their Medicine rating.
For injuries, each day of rest and medical attention a patient receives allows you to assist their END + Survival test at the end of the day to heal their injuries, using your own INT + Medicine target number.
For poisons and diseases, you may assist the patient’s END + Survival tests to help them recover. If the patient spent the entire day resting, they reduce the difficulty of this test by 1 allowing them to recover more quickly.
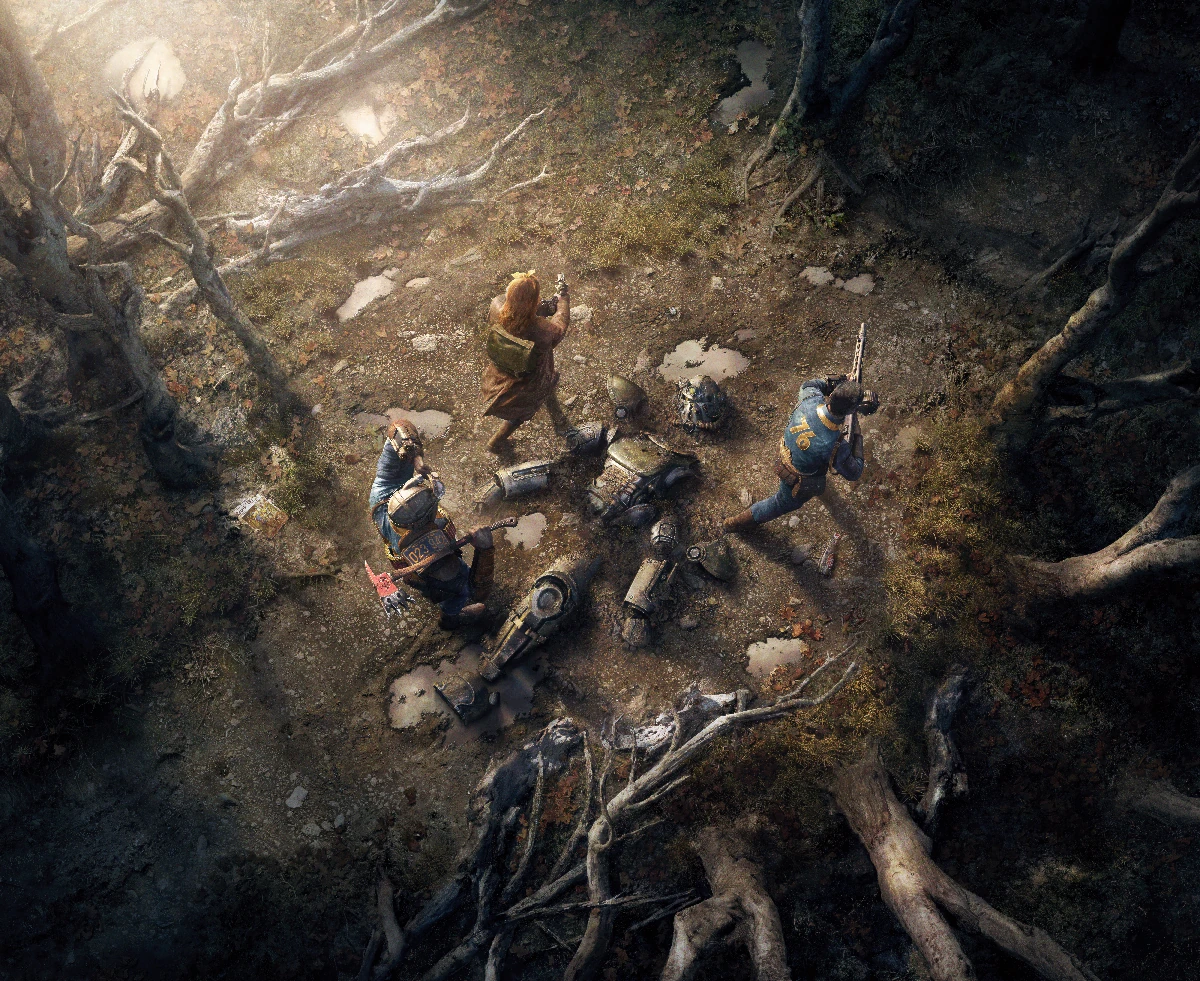
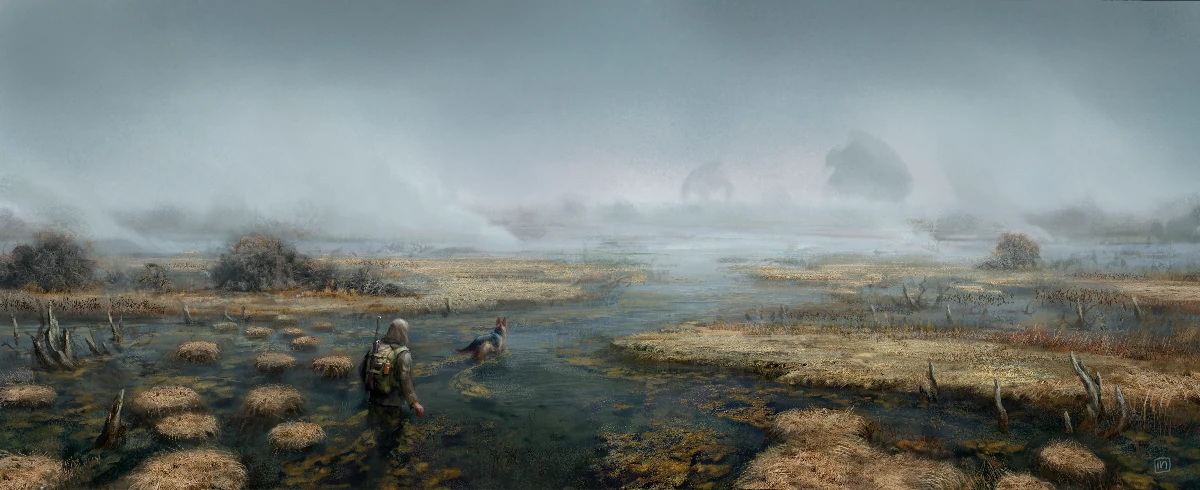
The Environment
In combat, knowing where everyone is can be vital. Fallout: The Roleplaying Game uses a system of zones to divide up combat environments and measure movement and range quickly and easily.
Each combat encounter happens in a single location. This may be a ruined building, a city street, an area of wilderness, or the floor of a vault. The location is divided into several zones based on the terrain features or natural divisions present in the area. For example, a vault may treat individual rooms and sections of corridor as separate zones, using the internal walls and doorways as dividing lines, while a city street may focus zones around features like burned-out vehicles, the fronts of buildings, alleyways, etc.
Mapping Your Environment
Zones aren’t fixed in size. Instead, they are as large or small as they need to be to describe the terrain, and they can be varied to accommodate the spaces in the encounter’s environment. For example, combat in a forest may be divided into many small zones amongst the trees, and a couple of larger zones representing clearings—larger zones for the clearings helps convey quicker movement and easier target acquisition in open areas, while the smaller zones convey cramped conditions and short lines of sight.
Under most circumstances zones are easy to describe—a few seconds to narrate the spaces and their relative positions, or to sketch out a rough map, with counters representing characters. Of course, this doesn’t prevent your GM from coming up with elaborate environments if they want to spend more time mapping out their encounters.
Distance And Ranges
Movement and ranged attacks use descriptive terms to measure their distance in combat, relative to the objects’ placement within zones.
Range is measured in the following five categories:
- Reach is when an object or character is within arm’s length of your character. You can interact with objects and make melee attacks within your reach. Being in reach of an enemy is disruptive to ranged attacks and tests, adding +2 to the difficulty of any test that isn’t a melee attack.
- Close range represents any distance within the zone you’re in—a distance of 0 zones.
- Medium range is any distance to something in the zone adjacent to your current zone. Medium range is a distance of 1 zone.
- Long range represents objects two zones away from your current zone. Long range is a distance of 2 zones.
- Extreme range represents any objects beyond long range. Extreme range is a distance of 3 or more zones.
MOVEMENT IN ZONES
When you move into a zone as part of a movement action, you can move your character within reach of any object within that zone. So, when using the Move minor action to move into an adjacent zone, you can move to any point in that zone. Equally, when using the Sprint action, you can move to any point within a zone that is 2 zones away. This could put you into Reach of an enemy, or an object you need to get to.
Environmental Conditions
Individual zones can have environmental conditions, like cover, difficult terrain, and hazards. Similarly, the environment as a whole may have some conditions that affect combat, like darkness or fog.
COVER
Cover provides additional Damage Resistance against physical and energy-based attacks. Objects in the environment will provide a certain amount of DR, as a number of Combat Dice (dC6), depending on what they’re made from and how resilient they are.
When you are attacked by a physical or energy-based attack while behind cover, roll the number of dC6 listed in the Cover Values table and add that result to your DR for that attack.
To benefit from cover, it needs to obscure the location hit, whether that’s from a melee or ranged attack. You can’t be targeted by an attack if the cover obscures your character’s entire body, as you can only be attacked by something that can see you.
Cover Values
| COVER TYPE | COMBAT DICE | |
|---|---|---|
| Foliage, Wood | 1dC6 | |
| Rubble, Ruined Brick Walls, Metal Fencing | 2dC6 | |
| Concrete Walls, Steel Barricades | 3dC6 | |
DIFFICULT TERRAIN AND OBSTACLES
Difficult terrain describes any ground that requires more effort to cross, either because it hinders you or because you need to be careful where you step. A zone may be filled with difficult terrain, slowing anyone attempting to cross it.
Obstacles are similar in that they hinder your movement, but they exist between zones—attempts to move from one zone to another where an obstacle is present may slow your progress. Obstacles may be barriers you need to climb up or over, or they might be gaps that you need to jump past.
When you attempt to move from an area of difficult terrain, or cross an obstacle, you must spend one or more extra Action Points to do so, depending on how difficult the terrain or obstacle is.
If you do not have sufficient Action Points available, then you need to find some way to generate them. The simplest way to do this is to take the Rally major action, generating action points with a Difficulty 0 STR + Athletics test—any successes become AP, which can be spent on moving through the terrain.
Difficult Terrain and Obstacle Examples
| TERRAIN | AP COST |
|---|---|
| Thick mud, loose sand, up stairs | 1 |
| Swamp, unstable rubble | 2 |
| Steep slope, fast-flowing water | 3 |
| OBSTACLE | AP COST |
|---|---|
| Up to waist-height/short jump | 1 |
| Up to chest-height/short jump with run-up | 2 |
| Taller than you/long jump | 3 |
ENVIRONMENT CONDITIONS
Some conditions affect multiple zones, or even the whole environment. Weather conditions and lighting are the most common examples of this.
Environmental Conditions Examples
| CONDITION | EFFECT |
|---|---|
| Poor Lighting/Darkness | PER tests that rely on vision and all ranged attacks increase in difficulty by +1, +2, or +3, depending on the light level |
| Mist and Fog | PER tests that rely on vision and all ranged attacks increase in difficulty by +1 when the target is at Medium range or further. |
| Rain | Ranged attacks with Energy weapons, and Survival tests, increase in difficulty by +1 or +2, depending how heavy the rain is. |
| Radstorm | Any creature not in shelter suffers 2dC6 radiation damage at the start of each turn. |
HAZARDS
Hazards are parts of the environment that inflict damage to creatures caught in them. A hazard may be present in a specific zone, or it may be spread among multiple zones. Hazards may be a persistent threat, or they might only occur if something specific happens to trigger them.
Hazard Examples
| HAZARD | DAMAGE |
|---|---|
| Falling debris | 3dC6 physical damage |
| Falling | 3dC6 Stun physical damage per zone fallen |
| Open flame | 2dC6 energy damage |
| Raging fire | 3dC6 Persistent energy damage |
| Electrical discharge | 3dC6 Stun energy damage |
| Toxic chemical (spill) | 2dC6 poison damage |
| Toxic chemicals (immersed) | 3dC6 Persistent poison damage |
| Irradiated water | 2dC6 Persistent radiation damage |
| Irradiated air | 2dC6 Piercing radiation damage |
| Close proximity to radioactive waste or materials | 5dC6 radiation damge |
DANGEROUS OBJECTS
An environment may contain objects that inflict damage or cause other effects based on the actions of those present—mines and other traps are common examples—as many folk in the wasteland use traps and even automated turrets to defend what’s theirs.
A dangerous object is triggered by a specific action occurring nearby. This might be a complication, or occur when a character enters a specific zone. Characters must attempt a test to avoid the damage (AGI + Athletics or PER + Survival to either dodge the trap or to spot the trigger just in time).
Dangerous Objects Examples
| OBJECT | TRIGGERED BY | TEST | DAMAGE |
|---|---|---|---|
| Frag mine | Close proximity (entering within Reach) | AGI + Athletics difficulty 2 | 6dC6 physical damage to everyone in the zone |
| Flammable gas | A spark or energy weapon beam (complication) | AGI + Athletics difficulty 2 | 4dC6 Persistent energy damage |
| Grenade bouquet | Tripwire (action, entering a zone) | PER + Survival difficulty 2 | 6dC6 physical damage to everyone in the zone |
| Shotgun trap | Pressure plate (action, entering a zone) | AGI + Athletics difficulty 2 | 6dC6 Vicious physical damage |
| Sentry turret | Turret sensors (action, entering a zone) | PER + Survival difficulty 3 | Turret acts on its initiative score, attacking the nearest target each turn |