Ch01 - Quickstart Guide Rules
1.0 A Universe of Possibilities
A Universe of Possibilities

"...TO BOLDLY GO WHERE NO ONE HAS GONE BEFORE." - FROM STARFLEET’S MANDATE
Welcome to the Second Edition Star Trek Adventures roleplaying game! This quickstart guide provides you with a condensed version of the games ruleset tand a short introductory adventure titled “The Celestial Algorithm,” designed to get you and your group playing right away. Use the included pre-generated characters and ship to collaboratively tell an amazing Star Trek story with your friends.
What is Roleplaying?
It’s likely you have experience with roleplaying games (RPGs) (or even just playing make-believe) and are familiar with many of the concepts used in this game. Roleplaying games are a form of shared storytelling. They’re about stretching the imagination to experience exciting adventures together in the vastness of space, on hostile planets and exotic locations, and learning something from the experience. By harnessing the power of your group’s collective imagination, you can experience situations far beyond that of a traditional board game or video game.
There is usually no formal start or end to a roleplaying game — the players and the gamemaster get together to play, and sessions could take a couple of hours each to a whole weekend to resolve. There is no winning or losing; just a great opportunity to get together, engage in conversation, create a story, and have a good time.
All games, however, have rules. This quickstart provides guidance to help everyone agree on what happens, to avoid disputes over the action, and to help everyone work together to make sure the experience is as fair as it is exciting.

>WHAT YOU NEED TO PLAY
- TWENTY-SIDED DICE: Two or more d20s are used for resolving tasks, and for rolling results on certain large tables. As many as 5d20 can be rolled at once.
- TOKENS: You’ll need some way to keep track of Momentum and Threat (covered later). You’ll need 6 tokens, beads or chips for Momentum, and at least a dozen for Threat.
- PAPER, PENS, PENCILS, ETC.: For making notes or maps
Fantasy Grounds Conversion Notes
The Fantasy Grounds ruleset for Star Trek Adentures contains everything you need to play.
- Dice: Appearance and displayed dice can be customized under the Dice option in the Tools Menu.
- Tokens: Momementum and Threat counts are tracked in the ruleset. GM can double-click to add tokens and click and drag from the counter to spend.
- Note Taking: Notes can be taken under the Player Notes option in the Player menu or on the Notes tab of player character sheets. The GM can also create and edit Story entries in the World menu.
- Getting Started: For notes on adding pre-generated characters to the game and assigning them to Players, see the Quickstart Campaign module which can be activated in the Modules option in the Library menu.
1.1 Operations
Operations
"YOU KNOW WHAT THE SECRET IS, DON'T YOU? DON'T FORCE IT. IF YOU JUST LET THE GAME HAPPEN, IT ALMOST PLAYS ITSELF.” - LT. ALYSSA OGAWA
The following section covers the core rules of Star Trek Adventures relevant to the adventure included in this quickstart. These rules are the foundation for the other rules in the game, and every player should have a basic understanding of these concepts during play. The complete ruleset can be found in the Star Trek Adventures second edition core rulebook.
The Core Mechanic
When your character attempts a task, the gamemaster tells you the Difficulty of the task (usually a number from 0–5). Check your character sheet and select an attribute and department best fitting the desired action. Attributes and departments have ratings defining your character’s physical and mental composition and how capable they are at various actions. Add the selected attribute and department ratings together to establish your target number.
Then, roll 2d20 (sometimes more dice, depending upon the situation) and check if any die rolls equal to or under the target number. If so, it counts as a success against the task’s Difficulty. The more difficult the task, the more successes are needed, whether it is making a convincing case in a diplomatic debate, leaping into a hovering shuttlecraft, or firing a phaser at an encroaching adversary.
Roll too high on the dice and you fail to accomplish the task. It may put the character in danger, or worse, but it makes the story more exciting. It is often when characters fail or make mistakes that the story really takes a dramatic turn, adding to the sense of threat and tension and making the adventure more compelling.
Characters
Each character has several statistics, indicating their competency with different physical and mental attributes, as well as their expertise in various departments.
.:ATTRIBUTES
A character has six attributes, rated from 7 to 12:
- CONTROL: A character’s self-discipline, coordination and fine motor skills.
- DARING: A character’s bravery and quick thinking, or acting without hesitation.
- FITNESS: A character’s physical strength and stamina.
- INSIGHT: A character’s understanding about their environment and other people.
- PRESENCE: A character’s personality, and ability to command attention or respect.
- REASON: A character’s logical and problem-solving abilities.
.:DEPARTMENTS
A character has six departments, rated from 1-5 based on their training:
COMMAND: A character’s ability to direct a crew or lead a team.
CONN: A character’s ability to pilot a ship or ground vehicle.
ENGINEERING: A character’s ability to resolve mechanical or technical problems.
SECURITY: A character’s ability to defend themselves or conduct investigations.
MEDICINE: A character’s ability to heal others and treat illnesses.
SCIENCE: A character’s knowledge and understanding of the universe.
.:FOCUSES
Focuses represent specialized subjects about which the character has more precise knowledge or experience. These focuses can be any topic, and apply to any attribute + department combination where the focus is relevant to the task.
EXAMPLES: Astronavigation, Astrophysics, Cybernetics, Diplomacy, Disruptor Weapons, Espionage, EVA, Exo-tectonics, Genetics, Hand-tohand Combat, Helm Operations, Infectious Diseases, Quantum Mechanics, Shipboard Tactical Systems, Spatial Phenomena, Transporters and Replicators, Virology, Warp Field Dynamics, Xenobiology
Scenes and Traits
Just like the events of a broadcast show or movie, gameplay in Star Trek Adventures is structured in scenes. Each scene may cover a few minutes or maybe an hour or more, during which the characters attempt to achieve a goal, overcome a problem, or otherwise engage in significant activities. Collectively, scenes are the building blocks of a mission, and serve as the foundation of gameplay.
Anyone familiar with Star Trek should have an idea of what a scene looks like: characters talk and act within a single location toward resolving the dramatic conflict present, moving to a new location or new characters when the group has resolved the conflict or decides to move on. The key is that scenes are the interesting parts of the story, and scene transitions often skip past the parts that aren’t interesting. Different groups may have different standards as to what is and isn’t interesting, so this concept is deliberately flexible.
Within these scenes, the gamemaster and players interact with traits, which are useful tools for defining how characters interact with strange new worlds and new civilizations.
.:ENCOUNTERS
Encounters are more tightly structured scenes dealing with a conflict between two or more sides — such as combat — in which the situation is divided into rounds and turns. During each round, each character involved takes a single turn, handing the action back and forth between sides.
.:SETTING THE SCENE
The gamemaster has the responsibility of setting up the scenes players experience, and on deciding when they end. The players have free rein to do as they wish within that scene, and the gamemaster can react through the actions of NPCs and by spending Threat to trigger logical and consequential changes in the environment and situation. When things within that scene have concluded, and nothing else can be done in that place at that time, the gamemaster should end the scene and move on to the next one.
.:TRAITS
Locations, characters, and situations all come in a variety of shapes and sizes, and these differences are handled in-game as traits. Each trait is a single word or a short phrase, which describes a single significant fact about whatever it is the trait belongs to.
Because a trait represents a significant fact, it imposes a context upon the world around it, and upon anything that interacts with whatever possesses that trait. These are useful for the gamemaster in adjudicating what is and isn’t possible — as well as how difficult those things are to attempt — and for the players in imagining the scene and figuring out how they can interact with it.
Traits have no specific duration. They exist so long as they represent something that is true. As soon as what a trait represents stops being true, the trait vanishes (or changes to one that reflects a new situation, such as Darkness being replaced by Brightly-lit when a location’s lights are turned on). Similarly, to remove a trait from a situation, it needs to stop being true, typically through the actions of the characters.
EXAMPLE: Chief O’Brien and several other engineers are boarding the abandoned space station Empok Nor. The gamemaster decides the station itself has the traits Abandoned Cardassian Station and Power Off-line. These are both location traits: they’re both facts about the location itself, and they persist while they remain true. If the engineers get the power back on-line, the Power Off-line trait will disappear, because it will no longer be true.
THE EFFECT OF TRAITS
The presence of a trait marks something as important to a scene or situation: not only is it true, but it is significant. It’s something that is likely to affect the decisions and actions characters make, and how the scene unfolds.
The effect traits have on play is to prompt the gamemaster to rule a specific way on the actions taken during the game. That is, if you’re in a room with a Locked Door, then you can’t leave the room until you find a way to unlock the door. If it’s Utterly Dark, then you can’t see. If you’re a Vulcan in a desert, you’ll find it easier to survive the hazards and perils.
If a trait would be helpful to whatever it is you’re trying to do, then that trait may make your action easier in some way, or otherwise produce some kind of benefit. If a trait would be troublesome to whatever it is you’re trying to do, then the trait may make your action more difficult, or result in additional problems. In some cases, this may even mean that a trait allows you to attempt something you couldn’t normally do (such as a tricorder letting you scan for radiation) or may prevent you attempting something you could normally do (a collapsed tunnel prevents you from going down a specific route), at least until the trait is removed.
POTENT TRAITS
If a trait has a particularly potent or intense effect—a larger effect than those listed above — the gamemaster can make it a potent trait, a single trait that has the effect of many. This can be denoted simply by adding a number after the name of the trait—this is the trait’s potency, which is the number of identical traits it counts as. Technically, all normal traits count as having Potency 1, but you don’t need to note this.
In a situation where Smoke may be a location trait, it may worsen and become Thick Smoke 2, which counts as two traits.
When you create a trait, you may instead increase or decrease the potency of a trait by 1: attempting to block enemy communications, you might change a Signal Jamming trait to Signal Jamming 2.
Tasks
Characters in Star Trek Adventures are specialists in their chosen fields, with enough breadth of training and practical experience to ensure they can solve problems and overcome obstacles as a matter of course. However, there are situations where a character’s success is in doubt or where failure or mishap are interesting.
The game presumes that, given sufficient time, the correct tools, and the ability to concentrate, a character will be able to succeed at just about anything they set their mind to. Failure is not a matter of inability, but rather of insufficient time, inappropriate tools, or some manner of obstacle or interruption. A course of action may be deemed impossible not because the character cannot do it, but because they don’t have the means to do it at that moment, and finding out a way to make the impossible possible is part of any officer’s duties.
A task begins with either the desire to achieve something or the desire to avoid something. A player states what they want to accomplish, and how they intend to get it. The gamemaster then judges, based on the current situation, whether the character can achieve that goal. The gamemaster will then determine one of three answers:
- YES: The character can achieve that goal without effort or challenge.
- NO: The character cannot achieve that goal, at least, not right now.
- MAYBE: The character might be able to achieve their goal, but success is uncertain.
The first two answers are easy enough to handle: the player states their intent, the gamemaster says “yes” or “no,” and play continues from there.
The third answer is where the dice come into play. Because there’s doubt as to the outcome, a task attempt determines what happens.
.:ATTEMPTING A TASK
A task roll involves a character’s attributes, departments, and focuses, and requires rolling two or more d20s.
The gamemaster may choose to change the combinations of attributes + departments on a case-by-case basis if a situation seems like it should use a different combination, or if a player comes up with some ingenious approach using a different combination.
>RE-ROLLS
Many circumstances allow a character to re-roll one or more dice. When re-rolling dice, the player chooses the number of dice to re-roll. They roll those dice, and the new result replaces the original result. The new results stand, even if they’re worse than the original results.
Some situations allow for a specific number of dice to be re-rolled, while others allow all the dice in a pool to be re-rolled. Players may always choose how many dice they wish to re-roll, up to the number of dice listed — in essence, you may always choose not to re-roll a die if you wish to keep that result.

.:EXAMPLE DIFFICULTIES
| DIFFICULTY | DESCRIPTION | ||||
|---|---|---|---|---|---|
| 0 | Researching a widely-known subject. Shooting a training target with a phaser or disruptor. Performing routine maintenance and repairs. | ||||
| 1 | Researching a specialized subject. Striking an enemy in hand-to-hand combat. Rerouting power during an emergency. | ||||
| 2 | Researching obscure information. Shooting an enemy with a phaser or disruptor. Repairing a transporter pad while under fire. | ||||
| 3 | Researching restricted information. Shooting an enemy with a phaser or disruptor in poor light. Altering a subspace antenna to overcome interference, without the proper tools. | ||||
| 4 | Researching classified information. Shooting an enemy in a defensive position with a phaser or disruptor, in poor light. Attempting to integrate Starfleet technology with the incompatible technology of another species. | ||||
| 5 | Researching a subject where the facts have been thoroughly redacted from official records. Shooting a small, fast-moving target with a phaser or disruptor, in poor light. Attempting a transport while at warp, to another vessel which is also at warp. | ||||
TASK DIFFICULTY
When the gamemaster calls for a task attempt, they set a Difficulty for that task. Many tasks list a basic Difficulty, which means the gamemaster doesn’t need to determine that baseline, but even those tasks should be evaluated in context to determine if other factors impact how difficult the task is at that moment.
Unless otherwise noted, most tasks have a basic Difficulty of 1, though more routine or straightforward tasks may have a Difficulty of 0, and more complex or problematic tasks have higher Difficulties. After this, the gamemaster then considers if there are any other factors in the current scene and environment, or affecting the characters involved, which would alter this basic Difficulty. The factors which affect a task’s Difficulty are commonly represented by traits in the scene.
The players should always know the Difficulty of the tasks they attempt: their characters are skilled professionals, who can easily evaluate how difficult an activity is. This allows the players to determine what they’ll need to do to have the best chance of success.
>DIFFICULTY ZERO TASKS
Certain circumstances can reduce the Difficulty of a task, which may reduce the Difficulty to 0. At other times, a task may be so simple that it does not require a dice roll. These are simple tasks. If a task is Difficulty 0, it does not require dice to be rolled: it is automatically successful with 0 successes, with no risk of complications. However, because no roll is made, it can generate no Momentum — even bonus Momentum from talents, particularly advantageous situations, etc. — and the character cannot spend any Momentum on the task. In essence, the gamemaster declares you complete the task, no dice are rolled, and you move on with the game.
At the gamemaster’s discretion, you may roll the dice against a Difficulty of 0 and can generate Momentum as normal (because 0 successes are required, every success generated is Momentum), but this comes with the risk of gaining complications.
>ROUNDING
Any time you need to round an equation during the game, round up.
IMPROVING THE ODDS
Even the most dedicated officers cannot give their full effort a hundred percent of the time; in tense situations, they need to conserve their energy, capitalize on opportunities, and be willing to take risks to triumph. Thus, the game provides several ways for you to improve your chances of success, by buying additional d20s to roll on a task. Extra dice allow you to score more successes, and thus succeed at tasks with higher difficulties or simply generate more Momentum. However, these extra dice always come with a cost, and which options a character chooses depends upon what costs they are willing and able to pay.
- MOMENTUM: The Create Opportunity (linked below) spend allows characters to buy additional dice, representing coordination, teamwork, and building upon prior successes. The first extra die bought costs 1 Momentum, the second costs 2 Momentum, and the third costs 3 Momentum.
- THREAT: The Create Opportunity spend can be paid for by adding to Threat (linked below) instead of spending Momentum, representing taking risks or acting recklessly. The first extra die bought adds 1 Threat, the second adds 2 Threat, and the third adds 3 Threat.
- DETERMINATION: Determination doesn’t add extra dice, but it does make the existing ones better. When spending Determination before rolling, the character chooses one d20 in the dice pool: that die is considered to have already rolled a 1 (therefore scoring a critical success, counting as 2 successes). Alternatively, if you spend Determination after rolling, you may re-roll any number of d20s in your dice pool. Determination may only be spent in certain circumstances, as described in the link below.
- TALENTS: A few talents state a character may reduce the cost of buying additional d20s, sometimes even to 0, but these dice still count towards the number of additional d20s that can be purchased.
In the gamemaster’s case, when buying bonus d20s for NPCs, there are fewer options — the gamemaster may spend points of Threat to add dice to a NPC’s task roll. NPCs typically do not have Determination.

TEAMWORK AND ASSISTANCE
Many tasks can benefit from teamwork. If the situation allows, several characters can work together when attempting to perform a task. When more than one character is involved in a task, one character is the leader, and the other characters are assistants. The gamemaster has the final say on whether a character can assist.
You may accept one assistant at no cost on any individual task. However, you may have additional assistants, but each extra person involved creates the potential for error: each assistant after the first either costs 1 Momentum or adds 1 Threat.
To assist with a task, the player must describe how their character is assisting the task’s leader. If the gamemaster agrees, then each assistant rolls 1d20, using their own target number, and their own focus (if any), to determine if any successes are scored. The assistants’ dice can generate complications as usual.
If the task leader generates at least 1 success, all successes generated by the assistants count toward the task. If the task leader does not score a success, the task fails, no matter how many successes their assistant(s) scored.
Assistants do not have to use the same attribute, department, or focus as any other character involved in the task; assistance can often be best provided by someone contributing something different. Assistants may only ever roll 1d20 while assisting. In encounters, assisting a task takes up a character’s turn.
.:OPPOSED TASKS
When you are attempting a task against direct opposition, like swinging a bat’leth at a foe who is trying to dodge out the way, or trying to move stealthily when someone is searching for you, you attempt an opposed task. The character attempting to do something is the active character, and the other character seeking to resist or avoid the first character’s attempts is the reactive character.
1. When you attempt an opposed task, the reactive character first rolls to set the Difficulty. They gather a dice pool, rolling against their own target number as if they were making a task roll. However, they are not rolling against any specific Difficulty; just counting how many successes they score.
2. The active character then makes their task roll. The Difficulty of this roll is equal to the number of successes the reactive character scored.
3. If the active character succeeds, they achieve their desired goal, and can spend any Momentum generated to improve that outcome as usual. If the active character fails, however, the reactive character generates 1 Momentum for each success fewer than the Difficulty scored — i.e., if they set a Difficulty of 4, and the active character scored 2 successes, the reactive character gets 2 Momentum — and they may spend this Momentum immediately, as if they had succeeded at the task.
4. After all this has been resolved, any complications suffered by either side are handled by the gamemaster.
.:COMPLICATIONS
When attempting a task, each d20 that rolls a 20 creates a complication, which comes into play once the task has been resolved.
If you roll a 20, and you don’t want to suffer a complication, or the gamemaster doesn’t want to impose a complication at this point in the scene, the complication can instead be ‘bought off’ by adding 2 Threat (see Threat, linked below). In essence, this turns an immediate problem (the complication) into a problem for later (more Threat).
EXAMPLE: While the Enterprise NX-01 is under attack, Ensign Sato is attempting to convince the captain of an unknown alien ship to help. Her initial attempt, however, is hindered by technical issues with the universal translator; she suffers a complication, Mistranslation. This may cause problems with further attempts to communicate.
COMPLICATION RANGE
Some circumstances can make a task more uncertain, though not necessarily any more difficult. These factors increase the complication range of a task, making it more likely that complications will occur.
A task has a complication range of 1 normally, meaning whenever you roll a 20 on a d20, you generate a complication. Increasing the complication range by 1 means complications occur on the result of a 19 or 20 on a d20. Increasing the complication range by 2 means complications occur on an 18, 19, or 20, and so forth, as summarized in the Complication Range table.
The Complication Range can never be increased to more than 5.
The gamemaster may freely rule on what complication range applies to a given task attempt, but there should always be some justification given. A trait may provide sufficient reason to increase a task’s complication range, as could the gamemaster choosing to spend Threat to represent something that distracts or interferes with the task.
.:COMPLICATION RANGE
| COMPLICATION RANGE | COMPLICATION OCCURS ON… |
|---|---|
| 1 | 20 |
| 2 | 19-20 |
| 3 | 18-20 |
| 4 | 17-20 |
| 5 | 16-20 |
.:SUCCESS AT COST
Some tasks can’t really be failed outright — rather, there is uncertainty as to whether the task can be completed without problems. Your gamemaster may allow characters to Succeed at Cost, either stating this before the task is attempted, or providing the option after the dice have been rolled. If this option is provided, you can choose to succeed at a task and suffer one automatic complication, in addition to any caused by 20s rolled. These complications function exactly as those generated by rolling a 20, including being able to remove them for 2 Threat, or using them to create other effects.
Though the task has technically been successful, you can’t spend Momentum to improve the outcome of a task that succeeded at cost — Momentum can only be spent if the task was truly successful.
In some cases, the ‘cost’ can be increased further, at the gamemaster’s discretion, causing your character to suffer more than one automatic complication on a failed task. This should be made clear when the option to Succeed at Cost is presented.
Momentum
Whenever you attempt a task and generate more successes than the Difficulty, extra successes become Momentum, a valuable resource allowing you to improve on your success or save for the group. You don’t begin a mission with Momentum — it only comes from taking action!
.:SPENDING MOMENTUM
The normal use for Momentum is to improve the outcome of a successful task, such as gaining more information from research, inflicting more damage with an attack, or making more progress with an ongoing problem.
When you succeed at a task, the gamemaster describes what happens. You can then spend Momentum to improve what happens, or to gain other benefits. Momentum used in this way doesn’t need to be declared in advance, and each point can be spent one at a time as required. For example, you may spend 1 Momentum to ask the gamemaster a question, and then decide if you want to spend any more Momentum for more information once you’ve gotten an answer. Thus, Momentum cannot be wasted by being used on something that wasn’t necessary.
Once a task has been resolved, any unspent Momentum is added to the group’s pool, as described below. Momentum that cannot be added to the group pool — because the group pool is already full or because it is bonus Momentum — is lost if it isn’t spent.
>BONUS MOMENTUM
Some situations, items, and talents grant a character bonus Momentum under specific circumstances. This is added to the amount of Momentum the character may spend in that circumstance. Something which grants bonus Momentum may specify that it may only be used in a specific way, such as buying d20s, increasing Difficulty, or some other purpose.
Regardless of how it is granted, bonus Momentum can never be saved: if it is not used when it is granted, it is lost.
.:COMMON MOMENTUM SPENDS
| MOMENTUM SPEND | EFFECT | ||
|---|---|---|---|
| Create Opportunity (buy d20s) (Immediate, Repeatable) | Before you roll a task (but after the gamemaster sets its Difficulty), you may buy up to three more d20s for your dice pool. The cost increases for each die purchased: the first d20 costs 1 Momentum, the second costs 2 Momentum, and the third costs 3 Momentum. You can’t roll more than 5d20 on a task attempt. | ||
| Create a Trait | You can spend 2 Momentum to establish a new trait in the scene or to change, increase or decrease the potency of, or remove a trait currently in play. A trait you create must relate to the task you just passed, and it must be something that would result from your actions. | ||
| Keep the Initiative (Immediate) | After taking a turn in an action scene, instead of handing the action to the opposing side, a character may choose to Keep the Initiative. To Keep the Initiative, the character who has just completed their turn may spend 2 Momentum and then hand the action to another character on their own side. Once one side has opted to Keep the Initiative, nobody on that side may do so again until the opposition has taken at least one turn of their own. Both player characters and NPCs may use Keep the Initiative. | ||
| Obtain Information (Repeatable) | You can ask the gamemaster a single question about the scene by spending 1 Momentum. The question must be related to the task attempted, and the gamemaster must answer truthfully but doesn’t have to give complete information. If there’s no information your character could determine, the gamemaster may answer “you don’t know,” but they must refund the Momentum spent for that question. | ||
| Reduce Time | You can spend 2 Momentum to reduce the time it takes to complete the activity represented by the task, typically taking half the normal amount of time. You can’t use this option during an action scene. | ||
| Extra Major Action | During your turn in an action scene, you may spend 2 Momentum to take an additional major action. However, any task roll attempted as part of this action increases in Difficulty by 1. | ||
| Extra Minor Action | During your turn in an action scene, you may spend 1 Momentum to take an additional minor action. Each minor action may only be performed once per turn. | ||
.:COMMON MOMENTUM OPTIONS
The options above are the most common ways to spend Momentum in Star Trek Adventures. These options are likely to cover most things that you’ll want to achieve with your Momentum during normal play.
Some Momentum spends can be used immediately when they are required, rather than waiting until a successful task. These spends are referred to as Immediate, and they can be used at any point in play, though most will specify when they are used. When you use these options, you may spend Momentum directly from the group pool or you may pay for them by adding to Threat instead, one for one — however much Momentum you’d normally spend, add the equivalent amount of Threat.
Most uses for Momentum can only be used once on a task, or once in any given round in a conflict. Some Momentum spends are Repeatable, which means they can be used as many times as you want and have the Momentum available to spend.
EXAMPLE: Lt. Commander Data’s scan of a spatial anomaly generated 3 Momentum. He spends the first point to gain additional information from his scan, which the gamemaster provides. After this, still having some more questions, Data spends a second point to ask another question.
.:SAVING MOMENTUM
Any Momentum you don’t spend is saved to a group pool, which can be added to or used by any player in the group, representing the benefits of your collective successes. This pool cannot contain more than 6 Momentum at a time. Any Momentum that cannot be added to the group pool is lost if it isn’t spent immediately.
After succeeding on a task, you may spend Momentum from the group pool in addition to those generated during that task. Momentum only needs to be spent as needed, so you don’t have to choose how much Momentum you’re spending from the group pool until you spend it, nor does it need to be spent all at once.
EXAMPLE: Lt. Commander Data has 1 Momentum remaining from his scan. He chooses to save it for later, rather than spending it. It’s added to the group pool, and can be used by someone else at a later point.
Threat
Similar to how players generate and spend Momentum, the gamemaster generates their own pool of points to spend, called Threat. The gamemaster spends Threat to alter scenes and empower NPCs much as players use Momentum to empower their characters. Threat is also a means of building tension — the larger the Threat pool, the greater the potential danger or challenge to your characters.
While your characters don’t know about Threat, they will have a sense of the stakes of a mission and of the potential risks.
Threat comes from action, much as Momentum does. Player characters and NPCs alike increase Threat during play, and the gamemaster spends that Threat to create consequences and raise the stakes during scenes. Threat serves as a visible “cause and effect” for the game, with actions and consequences linked by the rise and fall of the Threat pool.
The gamemaster begins each adventure with 2 Threat for each player character present, though this can be adjusted based on the tone and underlying tension of a given adventure. If the stakes are high, the gamemaster may choose to begin with more Threat per player character, while a calmer, quieter scenario may reduce the gamemaster’s starting Threat.
Whenever the game mechanics say to “add X Threat,” it means to add the listed number of points to the gamemaster’s Threat pool.
>WHAT CAN I DO BY GENERATING THREAT?
You can generate Threat in place of spending Momentum on Immediate Momentum spends. That means, once you’ve rolled your dice pool, you can only spend the Momentum you have generated and the Momentum you have in the group pool—you can’t generate Threat for the gamemaster to Obtain Information, for bonus Stress, or any other Momentum spend that isn’t Immediate.
IMMEDIATE MOMENTUM SPENDS
- BUY d20s: Add d20s to your dice pool. The first d20 adds 1 Threat, the second generates 2 Threat, and the third generates 3 Threat.
- KEEP THE INITIATIVE: Pass the order of play to an ally, rather than an enemy, for 2 Threat.
.:THREAT AND PLAYER CHARACTERS
Players add to Threat in a number of different ways, typically representing taking risks or allowing the situation to escalate, including:
- COMPLICATIONS: When you suffer a complication, you (or the gamemaster) may choose to ignore that complication, adding 2 Threat per complication ignored.
- ESCALATION: At times, the gamemaster (or the rules) may rule that a specific action or decision risks escalation, by making the situation more dangerous or unpredictable. If a character performs an action that risks escalation, they immediately add 1 Threat. Using lethal force — making an attack with the intent to kill — is always considered escalation. Carrying large and obvious weaponry, such as phaser rifles, bat’leths, or similar, can also count as escalation.
- IMMEDIATE MOMENTUM: Whenever you wish to use an Immediate Momentum spend, such as buying extra d20s for a task, you can choose to pay some or all of that cost by adding Threat instead. Add 1 Threat to the gamemaster’s pool for each point of Momentum you would have otherwise spent.
Players typically do not spend Threat: it is spent to challenge the player characters.
.:THREAT SPENDS
| THREAT SPEND | EFFECT | ||
|---|---|---|---|
| Complication | The gamemaster may create a negative trait by spending 2 Threat. This must come naturally from some part of the current situation. | ||
| Environmental Effects and Narrative Changes | The gamemaster may trigger or cause problems with the scene or environment by spending Threat. | ||
| NPC Complications | If an NPC suffers a complication, the gamemaster may buy off that complication by spending 2 Threat. | ||
| NPC Momentum | The Threat pool serves as a mirror for the players’ group Momentum pool. Thus, NPCs may use Threat in all the ways that player characters use group Momentum. | ||
| NPC Threat Spends | On any action or choice where a player character would normally add one or more points to Threat, an NPC performing that same action or making that same choice must spend an equivalent number of points of Threat. | ||
.:THREAT AND THE GAMEMASTER
The gamemaster may add to Threat in the following ways:
- NPC MOMENTUM: NPCS with unspent Momentum cannot save it as player characters can: NPCs don’t have a group Momentum pool. Instead, an NPC may spend Momentum to add to Threat, adding 1 Threat for every Momentum they spend.
- THREATENING CIRCUMSTANCES: The environment or circumstances of a new scene may be threatening or perilous enough to warrant adding 1 or 2 Threat to the pool automatically. Similarly, some NPCs may generate Threat simply by arriving in the scene, in response to changes in the situation, or by taking certain actions. This also includes activities that escalate the tensions of the scene, such as NPCs raising an alarm.
In return, the gamemaster can spend Threat in several ways, as detailed in the Threat Spends table.
Determination
In addition to momentum, players have access to a special resource called Determination. Determination reflects the fact that the player characters are the game’s protagonists, officers or others with ambition, drive, and grit beyond that of most beings. Such individuals make their own luck and shape the Galaxy around them through their actions and decisions. Whatever their inclination, the player characters are naturally prominent and influential people.
Determination can be used to pull off exciting stunts, provide an edge during tense situations, or otherwise help to advance the story. You gain and spend Determination from acting in accordance with your beliefs, represented by the character’s values. When your values aid you in what you’re seeking to achieve, you may spend Determination; while you gain Determination when your immediate goals and your values conflict with one another.
Values are short phrases or statements describing the attitudes, beliefs, and principles of your character, while Directives represent the orders and instructions provided by your organization and by your superiors.
Each player character begins each mission with 1 Determination and cannot have more than 3 Determination at any time. Any excess Determination is immediately discarded.
When you want to spend Determination, you can only do so if one of your values — or one of the mission’s Directives — aligns with the action you’re undertaking. Your values and Directives bolster your resolve, allowing you to draw strength from your beliefs, so you can push yourself further in battle or focus during an intense challenge.
Values can also hinder your character’s judgement, making them biased, blinding them to possibilities, or otherwise impairing their ability to confront a problem effectively. These situations can cause you problems, but also present opportunities to gain Determination.
.:SPENDING DETERMINATION
When you attempt a task, or are otherwise in a difficult situation, and one or more of your values (or one of the mission Directives) would be helpful in your current situation, you may spend Determination.
When you spend Determination, choose one of the benefits detailed in the Determination Spends table.
.:DETERMINATION SPENDS
| DETERMINATION SPEND | EFFECT | |
|---|---|---|
| Moment of Inspiration | You may spend Determination on a task roll, after the dice have been rolled, to re-roll any number of d20s in your dice pool. | |
| Perfect Opportunity | You may spend Determination on a task roll — before any dice are rolled, but after you’ve purchased any extra dice — to select a single d20 and set it so that it counts as having rolled a 1 (and thus scoring a critical success). | |
1.2 Conflict
Conflict
"THERE'S AN OLD SAYING: FORTUNE FAVORS THE BOLD. WELL, I GUESS WE'RE ABOUT TO FIND OUT." - CAPTAIN BENJAMIN SISKO
The sequence of events in any type of conflict is split into rounds and turns. In a round, each character takes a single turn, during which each character can attempt a single major action and several minor actions. The round ends when all characters present in the scene have taken a turn, if they can.
At the start of a conflict, the gamemaster chooses a character to take the first turn. The choice is based on the following:
- PLAYER CHARACTERS: By default, the gamemaster chooses a single player character to take the first turn. This may be an obvious choice, based on events that built up to the start of combat. If there is any uncertainty, the gamemaster selects the player character with the highest Daring to take the first turn.
- NON-PLAYER CHARACTERS (NPCs): If the NPCs have an obvious reason to take the first turn, (e.g., they have ambushed the player characters) the gamemaster can select an NPC to take the first turn.
- THREAT SPEND: If there is doubt as to who should act first, the gamemaster can spend 1 Threat to allow an NPC to take the first turn, instead of choosing a player character.
Turn Order
Once you have completed your turn — attempted a single major action and any minor actions — the action passes to the opposing side (typically the gamemaster), who will choose a single NPC to act next. Once that NPC has taken their turn, play goes back to the players, who decide which of the player characters left to act takes the next turn.
>KEEPING THE INITIATIVE
At the end of your turn, you can spend 2 Momentum (Immediate) to Keep the Initiative, handing the action to another player character instead. A character who takes a turn due to keeping the initiative must hand the next turn over to the opposition. In any case, no character may take more than one turn per round in a conflict.
Stress
Every main character has a limited ability to withstand stress, resist negative consequences, and avoid injuries during tense or dangerous situations.
A character can withstand a maximum amount of Stress equal to their Fitness attribute; your choice of species, talents, and other factors may affect this maximum. Each time your character faces a negative consequence, you may choose to suffer Stress instead.
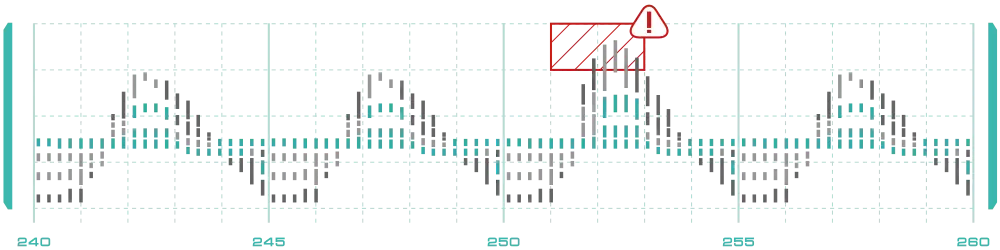
When you suffer Stress, the severity of the consequence — usually a number between 1 and 5 —tells you how much Stress you must endure: mark that amount of Stress on your Stress Track, like so:

If you can’t endure that amount without going over your maximum, suffer whatever Stress you can (up to your maximum) and suffer a complication, representing some additional problem faced during the conflict.
If you reach maximum Stress, you become Fatigued and can no longer suffer Stress. When Fatigued, pick one attribute: you fail any task using that attribute and add 1 Difficulty to all other tasks.
There may be other circumstances which cause you to suffer Stress. Exposure to extreme environments— intense heat or cold, or thin atmospheres—as well as physical fatigue, starvation, dehydration, sleep deprivation, poison, radiation, diseases, or substance withdrawal can all inflict Stress, at the gamemaster’s discretion.
.:RECOVERING STRESS
Starfleet officers and other characters lead intense, challenging, and often stressful lives. However, managing the stresses of such a life, and having ample time and opportunity to rest and recuperate, is a necessary part of an effective and happy crew.
A character can recover Stress in several ways. Each time you recover 1 Stress, clear one marked space on your Stress Track. If you’re Fatigued, you can only recover from Stress by resting, or if an ally helps you. Ways to recover from Stress include:
>MOMENTUM: After a successful task, you may spend 2 Momentum to remove 1 Stress (Repeatable) from yourself or one ally who can hear you. A character cannot remove more than 3 Stress in this way on any single task.
>REST: You can recover from Stress outside of conflict by spending time resting and relaxing:
- A breather is the most basic form of rest. This takes only a few minutes, during which you stop all strenuous activity, and perhaps grab a quick bite to eat or something to drink, or otherwise take a few necessary moments of recovery. You remove 4 Stress when you take a breather.
- A break is a more significant rest, taking at least half an hour, and up to a couple of hours. This may involve a modest meal, or taking some personal time for recreation, such as playing a game, reading, spending time on the holodeck, or creative pursuits. You remove 8 Stres s when you take a break.
- Sleep or a similar extended rest takes several hours, typically somewhere comfortable and quiet, and is normally accompanied by a meal and/or something to drink before or after sleep. Some characters, depending on species, may sleep less, but supplement this with meditation or other waking rest. You remove all your Stress, up to your normal maximum, when you sleep.
The gamemaster may adjust the amount of Stress removed by resting depending on the conditions and quality of rest. Poor conditions are usually a reason to do so — needing to rest in the wilderness, with limited rations and poor shelter may cut down the amount regained to half its normal value. Increasing the amount of Stress removed often comes from improved quality conditions, such as exceptional food and drink, or quality time spent with friends and loved ones.
At the gamemaster’s discretion, Stress can be recovered in other ways, but there should always be a cost to this recovery. Rest takes time, which could be spent doing something else. Attempting to find alternatives to rest, such as by using chemical stimulants, may have side effects or other consequences.
The Battlefield
In battle, knowing the location of every combatant is important, and determining both absolute position (where you are on the battlefield) and relative position (how far you are from a given friend or foe) is essential. Rather than track everything in precise distances, Star Trek Adventures resolves this matter using distances and zones.
.:ENVIRONMENTS AND ZONES
The battlefield in which you fight is always a discrete location — a building, a colony street, an area of wilderness, part of a starship, or another area. A battlefield is divided into several zones based on the terrain in the area. A simple battlefield may consist of three to five significant zones, while complex environments may have many more. For example, combat inside a starship may treat individual rooms as distinct zones, using the internal walls and bulkheads as natural divisions, while a city street may focus zones on features like parked vehicles, the fronts of buildings, alleyways, and so forth.
Track your characters’ place in combat by noting which zone they are in. This should be easy in most cases, as zones are defined by the terrain around them, tracking your character can be a matter of simple description: a character may be described as “behind the control console” or “standing by the shuttle”. This has the advantage of relying on natural language and intuitive concepts, rather than specific game terms, and avoids the tracking of relative distances which can become fiddly where there are many characters present.
Zones do not have a fixed size; they are based on the features of the battlefield. A forest may be divided into many small zones between trees, while its clearings will have larger zones. Larger zones convey quicker movement and easier target acquisition in open areas, while the smaller zones convey cramped conditions and short lines of sight.
Individual zones often have terrain effects defined when the gamemaster creates them, like cover or difficult terrain, interactive objects, or hazards. Some zones may be defined more by the absence of terrain than its presence, and some environments are enhanced by a few ‘empty’ zones between obstacles.
.:DISTANCES AND RANGE
Movement and ranged attacks range is measured in four distances and one state, based on the battlefield’s zones.
- Reach is the state when an object or character is within or moves into easy reach of your character. You enter Reach to interact with objects manually or to make a melee attack. When you move your character into or within a zone, you can declare that they are moving into or out of Reach of something. Being within Reach of an enemy increases the Difficulty of any task that isn’t a melee attack by 1.
- Close range is defined as the zone you are in, or a distance of 0 zones.
- Medium range is defined as an adjacent zone, or a distance of 1 zone.
- Long range is defined as two zones away, or a distance of 2 zones.
- Extreme range is any zone beyond long range, or a distance of 3 or more zones.
.:MOVEMENT AND TERRAIN
Moving to anywhere within Medium range requires a minor action. Moving further than this requires a major action. Movement can take many forms—walking, running, jumping, swimming, climbing, etc.
Difficult terrain describes any ground that requires more effort to cross, either because it hinders you or because you need to be careful where you step. A zone may be filled with difficult terrain, slowing anyone attempting to cross it.
Obstacles are similar in that they hinder your movement, but they exist between zones—attempts to move from one zone to another where an obstacle is present may slow your progress. Obstacles may be barriers you need to climb up or over, or they might be gaps that you need to jump over.
When you attempt to move from an area of difficult terrain, or cross an obstacle, you must spend one or more Momentum to do so, depending on how difficult the terrain or obstacle is. This is Immediate.
If you do not have sufficient Momentum available (and don’t want to add Threat), then you must find some way to generate the points you need. The simplest way to do this is to attempt the Sprint task as a major action, generating Momentum with a Difficulty 0 Fitness + Security task — any successes become Momentum, which can be spent on moving through the terrain. Other tasks can also generate Momentum in this way, but taking the Sprint major action combines movement and a task into a single action for the sake of convenience.
Characters with appropriate traits (representing gear for traversing terrain, or perhaps physical adaptations suitable to a particular type of movement) may reduce the cost of crossing types of terrain by 1, at the gamemaster’s discretion. For example, Denobulans evolved to climb quickly and efficiently, and would thus reduce the cost of difficult terrain when climbing.
.:TERRAIN MOMENTUM COSTS
| DIFFICULT TERRAIN | MOMENTUM COST |
|---|---|
| Thick mud, loose sand, stairs | 1 |
| Swamp, unstable rubble | 2 |
| Steep slope, fast-flowing water | 3 |
.:OBSTACLE MOMENTUM COSTS
| OBSTACLE | MOMENTUM COST |
|---|---|
| Wall or barrier up to waist height, or a short jump | 1 |
| Wall or barrier up to chest height, or a long jump | 2 |
| Wall or barrier taller than you, or a long jump with a run-up | 3 |
.:COVER
Cover is one of the most common terrain effects, representing objects that interfere with your ability to see or attack a target clearly. Cover allows you to turn an enemy ranged attack into an opposed task, giving you a better chance of resisting them and even allowing you to counter-attack.
A zone will either provide cover to any character in the zone, or the gamemaster may point out features within the zone that grant Cover (requiring you to be within Reach of that feature to benefit from it).
.:INTERACTIVE OBJECTS
Interactive objects are any object or terrain feature that you can manipulate. Doors and windows are a common example, as are control panels and computer terminals. Interacting with these objects may only take a minor action, but a complex object might need a major action, including a task, to interact with properly, at the discretion of the gamemaster.
Combat Actions
In any given turn in a combat, you can attempt one major action and one minor action. You may gain additional actions by spending Momentum or adding to Threat. Several common actions for combat are listed below.
.:MINOR ACTIONS
Minor actions are short activities that do not include a task, and which do not require dice to be rolled. They are taken in support of a major action, like moving into position before making an attack. You can take 1 minor action per turn, and you may take an additional minor action by spending 1 Momentum.
| ACTION | EFFECT | ||
|---|---|---|---|
| Aim | When you make an Attack this turn, you may re-roll a single d20 on the task roll. | ||
| Draw Item | You pick up an item within Reach or draw an item you are carrying. If using the item doesn't require a task to use, you can use it immediately as part of this minor action. | ||
| Interact | You Interact with an object in the environment, such as opening a door by pressing the control panel or issuing a simple voice command to a computer. Complex interactions may require a major action and a task roll instead. | ||
| Movement | You move up to one zone, to any point within Medium range. You cannot take this minor action in the same turn as a Movement major action. If there are any enemies within Reach of you, you cannot perform this action. | ||
| Prepare | You prepare for or set up a task. Some items require this minor action before they can be used, and some major actions require this minor action before they can be attempted. Sometimes items will grant special benefits if this action is used before performing a task. | ||
| Stand/ Drop Prone | You drop to the ground, making yourself a smaller target, or stand up from being prone. You cannot Stand and Drop Prone in the same turn. | ||
.:MAJOR ACTIONS
Major actions are the main activity you perform on your turn, and normally include a task. You can attempt one major action during your turn. You can attempt a second major action on your turn by spending 2 Momentum (this adds 1 to the Difficulty of any task on the second major action). You may also gain a second major action during the round if you are the subject of the Direct action. You may not attempt more than two major actions during any round.
| ACTION | EFFECT | |||
|---|---|---|---|---|
| Assist | You Assist a character with a task roll during their turn. (See Teamwork and Assistance, linked below). If they have not yet acted, take this action on your turn, and Assist when they take their turn. If they attempt a task before your turn, you may choose to Assist them immediately, but you give up your turn later in the round to do so. | |||
| Attack | You Attack an enemy or other viable target and attempt to injure them. See Makeing an Attack (below) for details. | |||
| Create Trait | This is a task with a Difficulty of 2, using an attribute + department and focus based on what you are doing. If successful, you create, change, or remove an existing trait, or increase or decrease the Potency of one. | |||
| Direct | This may only be attempted by one character on each side in a position of authority (the highest-ranking person, or a nominated leader). To take this action, you spend 1 Momentum, and select one ally who can hear you who immediately attempts a single major action, and you assist them by rolling 1d20 with your Control + Command. | |||
| First Aid | You attempt to revive a Defeated character within Reach. Attempt a Daring + Medicine task with a Difficulty of 2. If successful, the character is no longer Defeated, though they may still have an Injury. Alternately, you may tend to an Injury on another character within Reach. You attempt a Daring + Medicine task with a Difficulty equal to the Injury's severity. If you pass, one Injury is treated (see Recovery and Healing below). | |||
| Guard | You defend yourself, preparing for an attack. This is an Insight + Security task with a Difficulty of 0. Success increases the Difficulty of any attacks against you by 1 until the start of your next turn. You can confer the benefits of this task to an ally within Reach instead of yourself — this increases the Difficulty of this task by 1, and the benefit lasts until the start of your ally's next turn. | |||
| Other Tasks | Perform a task at the discretion of the gamemaster. Circumstances or objectives may dictate a task, and dangerous situations may require overcoming an extended task or completing a challenge. | |||
| Pass | You choose not to attempt a task. | |||
| Ready | You choose another major action to take as a reaction to something else. When the trigger event occurs, you temporarily interrupt the current character's turn to resolve your readied major action, then play proceeds as normal. If the triggering event does not occur before your next turn, the action is lost. You can still perform minor actions during your turn as normal. | |||
| Sprint | You run forward, trying to cross the area quickly. You move two zones, to any point within Long range. If there is difficult or hazardous terrain, you may attempt a Fitness + Conn task with Difficulty 0 as part of this action, to generate Momentum to cross the terrain as part of this action. | |||
.:MAKING AN ATTACK
An Attack is the most important and direct major action in combat. The process for making an Attack is as follows:
| 1. | CHOOSE A WEAPON AND TARGET: Select the weapon you wish to Attack with, and the target. You must also choose whether you intend to inflict a Stun or Deadly Injury; if you choose to inflict a Deadly Injury, add 1 Threat. * MELEE ATTACK: Can be attempted against any target within Reach. * RANGED ATTACK: Can be attempted against any target you can see. | |||||
|---|---|---|---|---|---|---|
| 2. | ATTEMPT THE ATTACK: Make a task roll to see if the Attack is successful. * MELEE ATTACK: Attempt a Daring + Security task with a Difficulty of 1. If the target is aware of your attack and able to defend themselves, this becomes this becomes an opposed task instead; resisted by the target's own Daring + Security. * RANGED ATTACK: Attempt a Control + Security task with a Difficulty of 2. If the target has Cover from the attack (see Cover), then this becomes an opposed task instead, resisted by the target's own Control + Security. | |||||
|---|---|---|---|---|---|---|
| 3. | RESOLVE ATTACK: If your Attack succeeded, you inflict an Injury upon your target (see Injuries, below). * COUNTERATTACK: If the Attack was an opposed task, and the target won, then they may either move out of Reach (if in melee) or spend 2 Momentum to Counterattack, inflicting an Injury upon you in return. * AVOID INJURY: A character who suffers an Injury may Avoid Injury (see below). | |||||
|---|---|---|---|---|---|---|
EXAMPLE: Attempting to drive the Borg from the lower decks of the Enterprise-E , Picard, Data, and Worf along with several other officers find themselves surrounded and under attack. Data buys an extra d20 with Momentum, and opens fire with his phaser type-2, rolling his Control (10) and Security (3). He generates the necessary two successes, and the Borg Drone is hit, suffering an Injury.
>BEING PRONE
While you have the Prone trait, the Difficulty of all Ranged Attacks against you from Medium range or further away increase by 1, and if you are in Cover, then you gain an additional +1 Protection. However, Melee Attacks and Ranged Attacks at Close range gain 2 bonus Momentum against you, and you cannot attempt any movement-related major actions. Remember that bonus Momentum cannot be saved.
.:INJURIES
When you successfully hit an opponent during combat, they may become Injured. Some environmental effects also come with a risk of Injury, such as falling from great heights, being set on fire, exposure to hostile environments, industrial or engineering accidents, and a range of other hazards.
When a character is hit by an attack, or is affected by a hazard (an environmental danger, such as a fire, falling rocks, or similar), they suffer an Injury.
The exact nature of the Injury is described as a character trait (see link below), one which represents the damage done to the character. As with any trait, this may make some actions more difficult, or even impossible, depending on what the Injury represents. When a character suffers an Injury, the nature of the attack or hazard which caused it will suggest a name for that Injury—for example, a disruptor may cause a Burn trait — but players or the gamemaster may suggest a fitting alternative. The gamemaster’s ruling on this is final, however.
All sources of Injury also have a severity. This is a number, normally between 1 and 5, which indicates how severe the Injury is. The severity of an Injury is important in a few different ways, explained below. When you succeed at an Attack, you may spend 2 Momentum to increase the severity by 1. This is repeatable, but you cannot increase the severity by more than 2.
When a character suffers an Injury, they are also Defeated. A defeated character immediately falls prone and cannot take any actions for the rest of the scene. Characters can recover from being defeated in a few ways, described in the following sections.
>NPCS AND INJURY
The rules for Injury here apply primarily to main player characters. NPCs and supporting characters are treated differently.
A Minor NPC, or any supporting character who does not possess any values, does not suffer Injuries. They are instantly Defeated by any successful attack and cannot choose to Avoid Injury. The only difference between Stun and Deadly attacks against a Minor NPC or basic supporting character is that Stun attacks leave them unconscious and Deadly attacks kill them instantly (or disintegrates them, at gamemaster’s discretion).
A Notable NPC, or any supporting character with one or more values, suffers Injuries as normal. Supporting characters may Avoid Injury as player characters do (but have only half the amount of initial Stress), while a Notable NPC may spend Threat equal to severity to Avoid Injury, but they can do so once per scene.
A Major NPC receives Injuries as normal and may Avoid Injury by spending Threat equal to severity.
>PROTECTION
Characters may attempt to protect themselves from harm using armor and forcefields.
A character wearing armor, or some other protective device, has Protection; for example, combat armor provides Protection 1. When you suffer an Injury, the severity is reduced by an amount equal to your Protection, to a minimum of 1.
SET PHASERS TO STUN
Injuries broadly come in two categories: Stun and Deadly, and which one an Attack or hazard inflicts will be listed in its description: for example, an Unarmed Attack inflicts Stun Injuries.
Some Attacks have multiple options for the kinds of Injuries they can inflict. For example, a phaser can inflict Stun or Deadly Injuries. Where this choice exists, you must choose which kind of Injury you wish to inflict when you choose the target of the attack. If you’re counterattacking, make this choice when you spend Momentum to counterattack.
- Stun Attacks are intended to incapacitate a target without causing lasting harm. An Injury caused by a Stun Attack only lasts while you are Defeated. If you stop being Defeated, a Stun Injury is removed at the end of your next turn, as you shake off the effects.
- Deadly Attacks are those which inflict serious harm upon the target, which might result in death. If you choose to make a Deadly Attack, add 1 Threat. While you have one or more Deadly Injuries and are Defeated, you are Dying, and you will die at the end of the scene if you do not receive medical attention first.
AVOIDING INJURY
When you suffer an Injury, you may Avoid Injury by taking Stress.
When you suffer an Injury, you may suffer Stress equal to the attack’s severity to ignore that Injury, having ducked out of the way at the last moment or otherwise evaded or resisted the attack. This also prevents you from being defeated by that Injury as well.
RECOVERY AND HEALING
You may provide First Aid to help defeated and injured allies. The First Aid action allows you to attempt a Daring + Medicine task with a Difficulty of 2 to tend to another character within Reach. If you complete the task, the patient is no longer Defeated. Alternatively, you may attempt a Daring + Medicine task with a Difficulty equal to the Injury’s severity to treat an Injury the patient has suffered.
A treated Injury no longer imposes any penalty, but it is still an Injury, and it will need proper medical treatment to remove entirely. Further, complications may result in a treated Injury “re-opening” during strenuous activity, requiring the Injury to be treated again.
Longer-term healing cannot be done during combat. An Injured character requires medical treatment to remove the Injury completely. This treatment is normally a Control + Medicine task with a Difficulty of X and takes X hours, where X is the severity in both cases. Add 1 to the Difficulty and the complication range if the Injury was not treated. This Difficulty may be modified further by circumstances— attempting to heal a severe disruptor burn in a damp cave with a basic medkit is much harder than attempting the same thing in a well-stocked sickbay.
If the patient has multiple Injuries, treating them all at once could be treated as a challenge, or even as an extended task (with a progress track of 3x the number of Injuries), at the gamemaster’s discretion.
Combat Momentum Spends
Momentum is a key tactical resource during combat. When you generate Momentum in combat, you have numerous options available to achieve victory over your enemies, empower your comrades, and bolster your own prowess. You have all the normal Momentum options available to you in a combat scene, with additional options related directly to combat.
Spends listed as Repeatable means they can be repeated as many times as you have Momentum to pay for them, and spends listed as Immediate can be played at any time during your turn (and can be paid for by generating Threat). If a Momentum spend is neither Immediate nor Repeatable, you can only use them once per turn.
.:COMBAT MOMENTUM SPENDS
| COMBAT MOMENTUM SPEND | DESCRIPTION | |
|---|---|---|
| Added Severity (2 Momentum, Repeatable) | Increase the severity of a successful attack by 1 for every 2 Momentum spent. | |
| Alter Trait (2 Momentum) | You create, change, or remove a trait in the scene. This change must relate to the task completed. | |
| Extra Minor Action (1 Momentum) | You take one additional minor action on your turn. | |
| Keep The Initiative (2 Momentum, Immediate) | At the end of your turn, pass the next turn to an ally instead of an enemy. Once that ally has acted, the next turn must go to an enemy. | |
| Obtain Information (1 Momentum, Repeatable) | You ask the gamemaster a single question about the scene, which the gamemaster must answer truthfully. | |
| Extra Major Action (2 Momentum) | You may attempt one additional major action. If this action includes a task, the task's Difficulty is increased by 1. | |
| Disarm (1–2 Momentum) | Target drops one weapon they are holding to within their Reach. This costs 1 Momentum if the weapon is held in one hand. If the weapon is two-handed, the cost increases to 2 Momentum. | |
| Buy D20s (1–3 Momentum, Immediate, Repeatable) | Before you attempt a task, you can buy up to three more d20s for your dice pool. The first die costs 1, the second die costs 2, and the third die costs 3. | |
Combat Equipment
This section details weapons, protective gear, and other items used in combat. These have additional rules beyond being treated as an equipment trait.
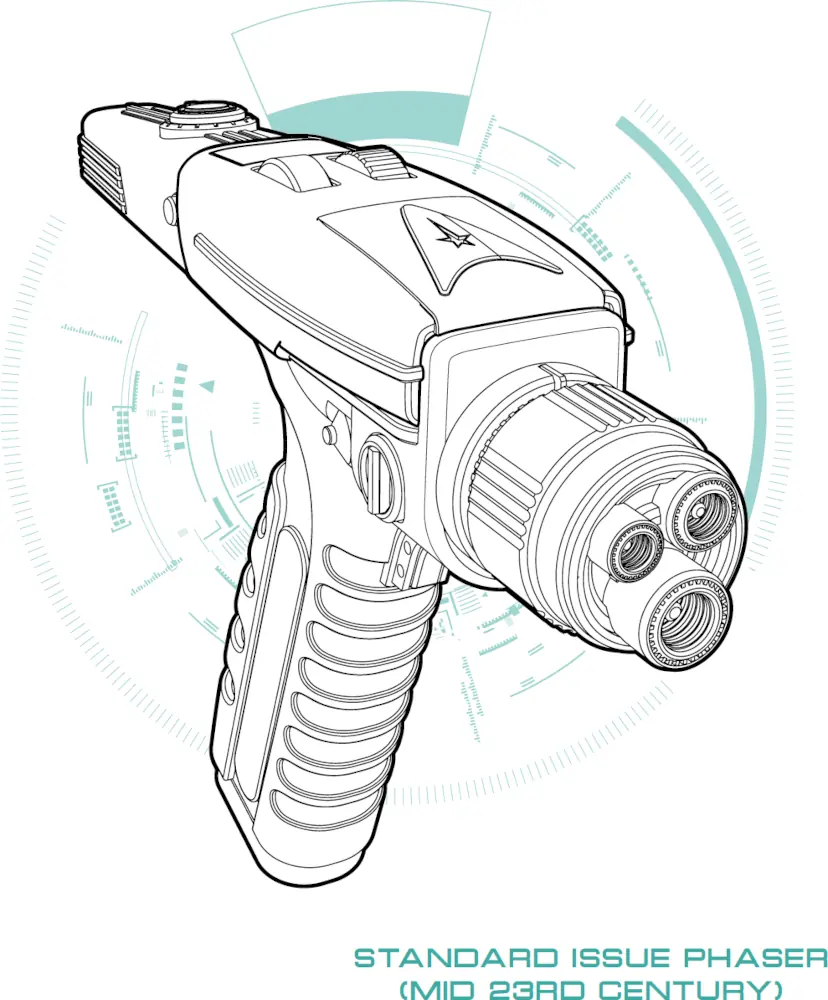
.:WEAPONS
While peace is Starfleet’s goal, means of self-defense against aggressors are often necessary. Starfleet thus makes use of several different types of weapons.
Weapons and other forms of attack, as well as the damage caused by hazards, have a few common elements that determine the specifics of how they function. The key elements of a weapon are what type of weapon it is, its damage rating, the size of the weapon, and any qualities it possesses that influence how it is used.
- WEAPON TYPE: Either melee or ranged, determining what kind of attack it allows you to make.
- INJURIES: The type of Injury the weapon inflicts. If the weapon has multiple options, all of them will be listed.
- SEVERITY: The severity of the Injuries the weapon inflicts. This is used to determine the cost of avoiding the Injury, and the Difficulty of tasks to treat or heal the Injury.
- SIZE: Weapons will either be one-handed (1H) or two- handed (2H). A two-handed weapon can be used in one hand to make an attack, but the Difficulty increases by 1.
- QUALITIES: Additional rules, providing additional restrictions or benefits to the weapon’s use.
QUALITIES
The following additional qualities alter the way the weapon functions, some in positive ways, others by applying restrictions.
- ACCURATE: The weapon is especially precise, often incorporating sights that allow increased accuracy. If you perform the Aim minor action before making an attack with this weapon, then you can re-roll up to two d20s in your dice pool, rather than only one.
- AREA: The attack affects a wider area, and can affect several targets at once. When you succeed at an attack, additional targets in the same zone may be hit by spending 1 Momentum for each additional target (Repeatable). This attack may Succeed at Cost.
- CHARGE: The weapon has an adaptable output, allowing its potency to be scaled to different levels. If you perform the Prepare minor action before attacking with this weapon, you may add one of the following qualities to the attack: Area, Intense, or Piercing. If you choose Area, the attack’s severity is reduced by 1.
- CUMBERSOME: The weapon takes patience and precision to use effectively. You cannot attack with a cumbersome weapon unless you take the Prepare minor action on the same turn.
- DEBILITATING: The Difficulty to treat or to heal injuries caused by this weapon is increased by 1.
- GRENADE: The weapon is a throwable explosive or energy device. You can attack a target up to Medium range and have enough grenades for three separate attacks.
- HIDDEN X: You can use a minor action to conceal this weapon. Any search for the weapon requires an Insight + Security or Reason + Security task with a Difficulty of X.
- INACCURATE: The weapon is imprecise and clumsy. You do not benefit from the Aim minor action when making an attack with this weapon.
- INTENSE: The weapon has an especially potent effect if well-directed. When making an attack with this weapon, you may increase the severity by spending 1 Momentum, rather than 2 (Repeatable).
- PIERCING: The weapon is especially good at cutting through layers of protection. A successful attack with this weapon ignores any Protection the target has.